Ashta Cream (Easy)

Ashta Cream Egyptian Recipe

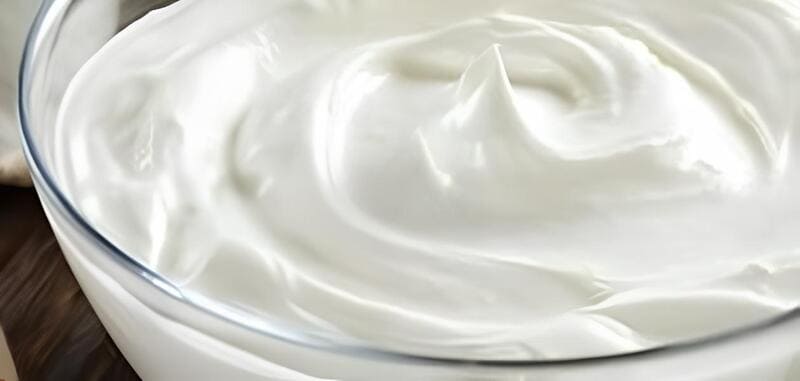
Celebrated for their lush texture and versatile usage, Ashta cream—also known as qashta or qeshta—is a cornerstone of Middle Eastern desserts. Revered during festive seasons like Ramadan, this thick, clotted cream is an essential layer in many Arabic sweets, bringing a rich, creamy experience to delights such as baklava and kunafa.

This homemade Ashta cream version is simple yet profoundly satisfying. Its recipe uses common kitchen staples, ensuring accessibility. Much like a symphony, each ingredient contributes its unique notes, culminating in a harmonious, creamy concoction. This recipe offers a delightful balance of textures and flavors, encouraging you to explore the delicious landscape of Egyptian desserts.

Ingredients

  • 1 liter of milk
  • 2 tablespoons vinegar
  • 2 tablespoons cornstarch
  • 2 tablespoons flour
  • 1 tablespoon butter
  • ½ teaspoon mastic (optional)
  • Water (as needed)

Preparation

  1. Heat the milk in a large pot over high heat until nearly boiling.
  2. Add the vinegar to the pot and stir until the milk curdles and separates into solids and whey.
  3. Allow it to boil slowly for 5 minutes, then strain the curds using a cheesecloth or fine strainer.
  4. In a separate saucepan, mix the strained curds with the cornstarch and flour.
  5. Gradually add the milk while stirring continuously over medium heat until the mixture thickens.
  6. Remove from heat once the mixture reaches a thick, creamy consistency.
  7. Stir in the butter and finely crushed mastic, if using, until fully incorporated.
  8. Spread the mixture in a tray, cover, and let it cool to room temperature before refrigerating for at least an hour.

Did you know?

The origins of Ashta cream stem from centuries-old traditions in the Middle East, where it has been a luxurious topping or filling in numerous pastries. Known as “qeshta” in Egyptian and Levantine cuisines, this cream is distinct from Western equivalents due to its unique preparation methods. The process of curdling milk with vinegar to create this thick layer is akin to making clotted cream but imbued with regional nuances.

When it comes to cultural significance, Ashta cream is indispensable during religious celebrations such as Ramadan. It is generously layered in sweets like Kunafa and Othamaliyah, each bite evoking communal warmth and festive spirits. As for its versatility, besides being a part of intricate desserts, Ashta cream can also be a simple yet indulgent topping for fruits, adding a creamy contrast.

Interestingly, the caloric content of Ashta cream can vary widely based on how it’s prepared or used. While indulgent, there are ways to prepare a more healthy version by adjusting the amount of butter or using low-fat milk. Nevertheless, this delightful cream remains a beloved staple in Middle Eastern households, contributing a rich and irresistible flavor profile to any dish it graces.

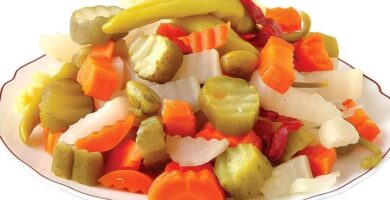
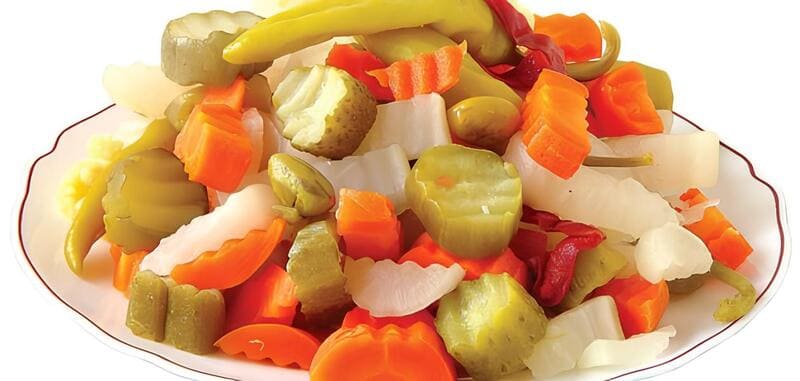
Egyptian Mixed Pickles

Egyptian Mixed Pickles Egyptian Recipe

Egyptian mixed pickles, known locally as mukhalal or torshi, are a common delicacy enjoyed throughout the country. Infused with a vibrant blend of vegetables like carrots, turnips, and cauliflower, these pickles are typically prepared during Ramadan and other festive occasions. Their distinct savory, tangy, and slightly spicy flavor makes them a perfect accompaniment to various Egyptian dishes.

What sets Egyptian mixed pickles apart is their meticulous preparation and thoughtful use of ingredients like nigella sativa and hot red pepper sauce. Homemade pickles are often preferred over store-bought varieties, ensuring the purity and desired taste that speaks to Egypt’s rich culinary traditions. This recipe exemplifies that preference for homemade goodness.

Ingredients

  • 2 carrots
  • 1 lemon
  • Small onions (urama)
  • 1 medium cauliflower
  • Small turnips
  • 1 cucumber
  • 1 red bell pepper
  • 1 tablespoon nigella sativa
  • Celery
  • Salt
  • Vinegar
  • Sugar
  • Water
  • Hot red pepper sauce

Preparation

  1. Wash the lemon, place it in a pot with water, and bring it to a boil.
  2. Meanwhile, chop the cauliflower into small, manageable pieces.
  3. Peel and slice the carrots.
  4. Boil the urama onions in another pot until they are tender but not mushy.
  5. Peel the turnips and cut them into small cubes or finger-sized pieces.
  6. Peel the cucumber and slice it into rounds.
  7. Chop the red bell pepper and grate half to extract the juice.
  8. In a bowl, mix the grated carrot, red bell pepper, nigella sativa, celery, salt, and hot red pepper sauce. This will serve as the flavor base for the pickles.
  9. Combine the prepared vegetables (cauliflower, carrots, onions, turnips, cucumbers, lemon, and bell pepper) in a large mixing bowl.
  10. Layer the vegetable mixture into sterilized jars.
  11. In a saucepan, mix 3 liters of water with 12-13 teaspoons of salt and 1 tablespoon of sugar. Bring to a boil and let it cool.
  12. Pour the cooled brine solution into the jars, covering the vegetables completely.
  13. Add a splash of vinegar to each jar.
  14. Seal the jars tightly, ensuring the vegetables are submerged in the brine.
  15. Add a layer of oil on top to prevent air from entering.
  16. Store in a cool, dark place for at least 15 days before serving.

Did you know?

Mukhalal, or Egyptian mixed pickles, are more than just a side dish; they are a reflection of Egypt’s agricultural bounty and culinary heritage. The word “mukhalal” itself means pickled or marinated, indicating a method used historically to preserve various vegetables. Pickling has been an integral part of Egyptian cuisine for centuries, helping families preserve their harvests. Pickles (mukhalal) can vary greatly in flavor and composition depending on the region and household preference.

Common additions might include beets for color, garlic for extra zest, or even green beans. Another interesting fact is the inclusion of nigella sativa, known locally as “habbat al-barakah,” which not only enhances the flavor but also adds nutritional value with its antioxidant properties. Homemade pickles are a staple during festive seasons like Ramadan.

They are believed to aid digestion, making them a suitable accompaniment for the rich and hearty iftar meals. By ensuring the optimal blend of salt, vinegar, and spices, Egyptian families create pickles that are uniquely their own, a cherished tradition passed down through generations. So, the next time you relish the tangy crunch of Egyptian pickles, know that you are savoring a piece of Egypt’s culinary history.

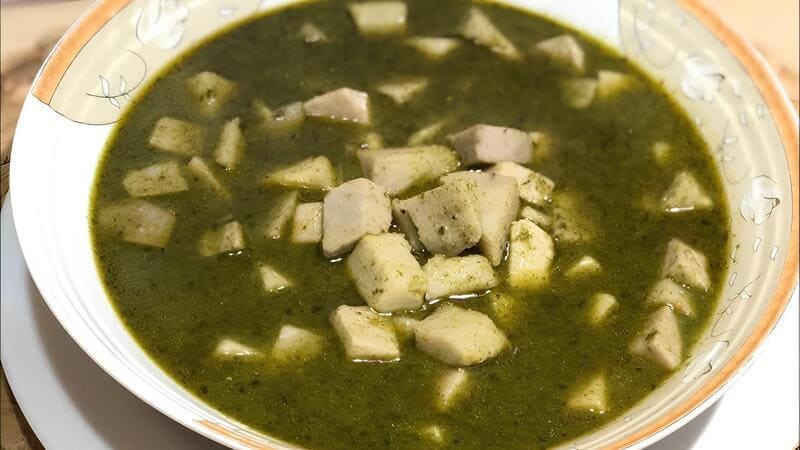
Egyptian Taro Soup (Kolkas)

Egyptian Taro Soup Egyptian Recipe

Egyptian Taro Soup, or Kolkas, is a cherished winter dish in Egypt. Historical connections to Egyptian cuisine make this soup more than mere food; it represents warmth and familial bonding. The taro root’s gelatinous texture and its unique flavor profile set it apart, making it a highly anticipated dish during the chilly season.

Commonly prepared during special occasions, this simple yet delicious recipe has deep traditional roots. The distinct taste of the taro root combined with other flavor-enhancing ingredients like chard and coriander creates a comforting brew that is both savory and wholesome. Now, let’s delve into the preparation of this classic dish.

Ingredients

  • 1 kg taro root
  • 1 kg beef or lamb, cubed
  • 1 large onion, finely chopped
  • 2 tomatoes, diced
  • 1 bunch of chard, leaves only
  • 1 bunch of coriander leaves
  • 1 garlic head, minced
  • Juice of half a lemon
  • 2 tablespoons ghee
  • 1 teaspoon salt
  • 1 teaspoon black pepper
  • 1 teaspoon vinegar

Preparation

  1. Peel and clean the taro root using a towel; never wash it with water.
  2. Cut the taro into cubes as per your preference.
  3. Clean and wash the chard and coriander leaves, drying them thoroughly.
  4. Boil the meat cubes in water with a pinch of salt and pepper until tender.
  5. Blend the chard and coriander leaves to a smooth consistency, traditionally done with a pestle and mortar but nowadays using a hand blender.
  6. Heat 1 tablespoon of ghee in a large pot and sauté the minced garlic until golden.
  7. Add the coriander and chard mix, cooking it for a few minutes. Mix it well with the garlic.
  8. Add the meat broth along with the boiled meat pieces into the pot.
  9. Incorporate the taro cubes, stirring them into the mixture.
  10. Add the diced tomatoes and finely chopped onions.
  11. Cook until the taro is tender and the flavors meld together.
  12. Stir in lemon juice, a splash of vinegar, and adjust the seasoning with salt and black pepper.
  13. Serve hot, garnished with a spoonful of ghee for an extra rich flavor.

Did you know?

Kolkas, or Egyptian Taro Soup, boasts a rich cultural history beyond its satisfying flavor. Taro is one of the oldest cultivated plants in the world, purportedly originating in Southeast Asia, before making its way into Egyptian cuisine. This root vegetable, known for its nutrient-dense profile, contains beneficial carbohydrates and resistant starches, which aid in digestion.

Taro is referred to by various names globally, known as “Kalo” in Hawaiian cuisine and commonly used in Lebanese dishes as well. Its adaptability across different culinary traditions highlights its versatility. When preparing taro, its gelatinous substance is crucial for the right texture and taste; hence, traditional methods forbid washing it with water as it strips away this vital component.

Besides, taro’s antioxidant properties help enhance the immune system, making Kolkas an optimal winter dish. The combination of chard and coriander not only provides a fresh, herby flavor but also adds to the soup’s nutritional value, ensuring that every bowl of Kolkas you serve is as healthful as it is flavorful.

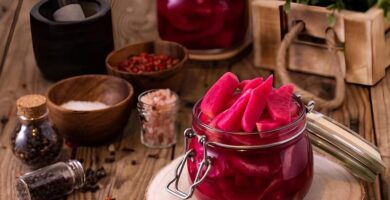
Egyptian Pickled Turnips

Egyptian Pickled Turnips Egyptian Recipe

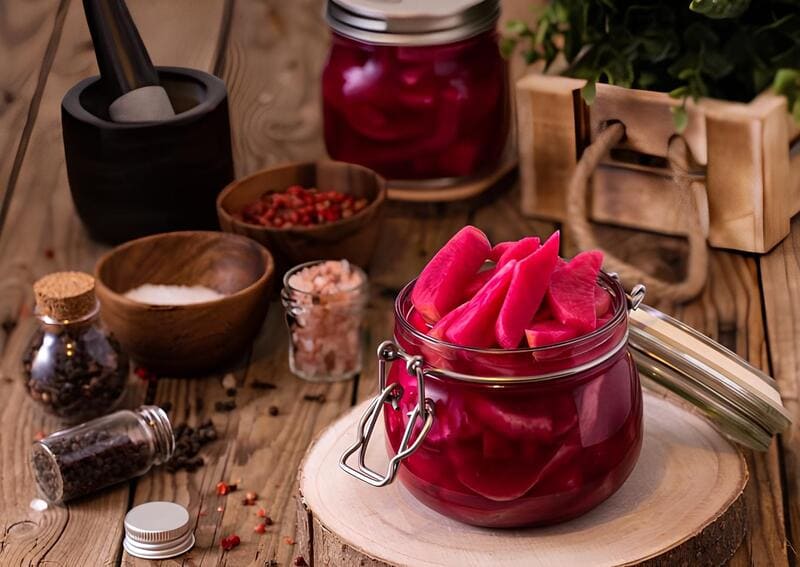
Egyptian cuisine offers a delightful array of pickled vegetables, and pickled turnips are a beloved staple. Known in Egypt as “Lift,” these bright pink delights bring a tangy, slightly salty flavor to your palate, making them an essential companion for dishes like falafel and shawarma. With their visually striking color and unique taste, they are a feast for both the eyes and the taste buds.

Historically, pickling has been a crucial method for preserving vegetables across the Middle East. In Egypt, the addition of beetroot not only adds a beautiful pink hue but also subtly enhances the taste profile of these pickles. Often enjoyed as mezze or a condiment, pickled turnips are simple to prepare yet immensely rewarding in flavor and texture.

Ingredients

  • 2 large turnips
  • 1 small beetroot
  • 1 cup of white vinegar
  • 2 liters of water
  • 4 tablespoons of salt
  • Optional: Cabbage or lettuce for extra crunch

Preparation

  1. Wash the turnips thoroughly and trim any imperfections.
  2. Slice the turnips into finger-sized pieces, ensuring they are firm and not soft.
  3. Place the turnip slices into a bowl and sprinkle 1 tablespoon of salt over them. Let them sit for about 2 hours until the water is drawn out.
  4. Rinse the turnips well under cold running water to remove excess salt.
  5. Thinly slice the beetroot, retaining all parts for maximum color infusion.
  6. In a large jar, layer the turnip slices and beetroot slices.
  7. In a separate container, mix the white vinegar, water, and remaining salt until fully dissolved.
  8. Pour the vinegar mixture over the turnips and beets, ensuring everything is submerged.
  9. Seal the jar tightly and let it sit at room temperature for 10-15 days, depending on the weather conditions.

Did you know?

Pickled turnips are not just a vibrant addition to your dishes; they also boast numerous health benefits. The fermentation process enriches these turnips with probiotics, which aid in digestive health. The presence of beetroot adds an extra nutritional punch, as beets are rich in antioxidants, fiber, and essential nutrients such as folate and potassium.

In Middle Eastern and Arabic cuisine, pickled turnips are often enjoyed with a variety of foods including grilled meats, falafel, and sandwiches. Their tangy flavor pairs exceptionally well with the earthy, rich flavors of these dishes.

Although they are a traditional staple in Egyptian meals, they are also popular in Lebanese and other Middle Eastern culinary traditions. Interestingly, the quick pickling process allows for a rapid infusion of flavors, making it a quick and convenient way to add a healthy and vibrant element to your meals.

So, the next time you’re pondering what to do with those extra turnips, consider making these pink pickled delights. Not only are they easy to prepare, but they also add a delightful burst of flavor and color to any dish, showcasing the timeless charm of traditional Egyptian cuisine.

Mallow Leaf Soup (Khobiza)

Mallow Leaf Soup Egyptian Recipe

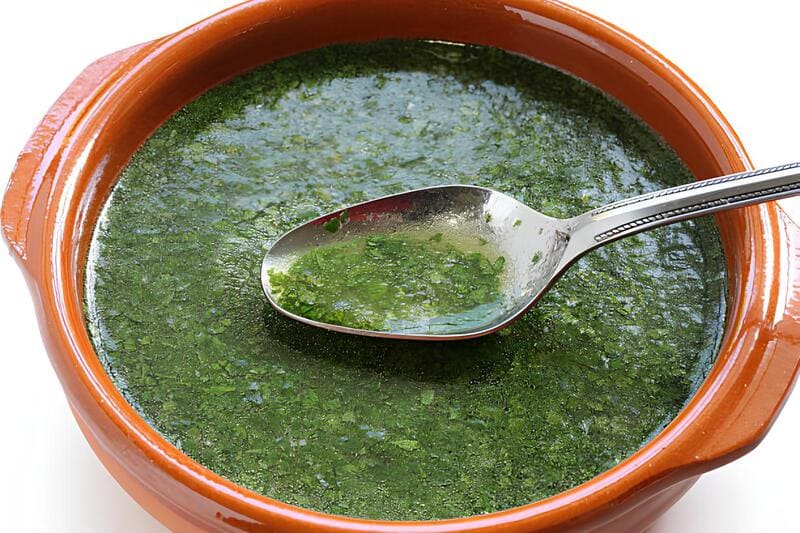
Mallow Leaf Soup, or Khobiza, is a cherished dish in Egyptian cuisine, renowned for its nourishing properties and deep connection to the country’s gastronomic heritage. Its vibrant green color and earthy, slightly tangy flavor make it a comforting addition to any meal, especially enjoyed during colder months.

Traditionally served with bread or rice, Khobiza embodies simplicity and freshness. The use of mallow leaves, sometimes combined with Swiss chard, creates a rich and hearty soup that is not only soul-warming but also brimming with nutritional benefits. This recipe will guide you in preparing this classic dish step-by-step.

Ingredients

  • 1 package of fresh hibiscus (mallow) leaves
  • 1 bunch of Swiss chard, boiled
  • 1 small bunch of dill, finely chopped
  • 1 small bunch of green coriander, finely chopped
  • ¼ cup of washed and soaked rice
  • 1 tablespoon of ghee
  • Salt to taste

Preparation

  1. Wash the mallow leaves and cut them into small pieces.
  2. Boil the Swiss chard and set it aside.
  3. Combine the mallow leaves with the boiled Swiss chard in a large pot.
  4. Add the finely chopped dill and green coriander to the pot.
  5. Sprinkle the soaked rice over the mixture.
  6. Pour in enough water to cover the ingredients, ensuring the mixture doesn’t overflow.
  7. Heat the pot until the soup begins to boil, then reduce to a simmer.
  8. Continuously stir to avoid sticking, ensuring the rice is fully cooked.
  9. In a separate pan, heat the ghee and fry the rice with a bit of oil until golden, then add it to the soup.
  10. Season with salt, and keep stirring until the soup achieves a thick but not dry consistency.
  11. Serve hot with a side of bread or vermicelli rice, ensuring every bowl is generously portioned.

Did you know?

Mallow Leaf Soup is more than just a tasteful delight; it’s a nutritional powerhouse. The mallow plant (Hibiscus cannabinus) and its seeds are packed with vitamins A and C, calcium, and iron. These nutrients boost your immune system, improve skin health, and promote bone strength. In folk medicine, mallow has been traditionally used to soothe throat irritations and combat inflammation.

The health benefits extend beyond vitamins. Mallow leaves provide dietary fiber, which aids digestion, and antioxidants that help fight off free radicals. The dill and coriander used in the recipe are also rich in essential oils and antioxidants, contributing to overall well-being. Interestingly, Swiss chard, sometimes added to the soup, contains betalains known for their anti-inflammatory properties.

In Egyptian culture, mallow soup is especially popular during the winter months and is considered a comfort food, bringing warmth and a sense of community. Its simplicity and nutritional value make it a timeless recipe that not only pleases the palate but also nurtures the body. So, the next time you prepare Khobiza, you’re not just making a meal—you’re creating a nourishing experience passed down through generations.

Broccoli Hummus

Broccoli Hummus Egyptian Recipe

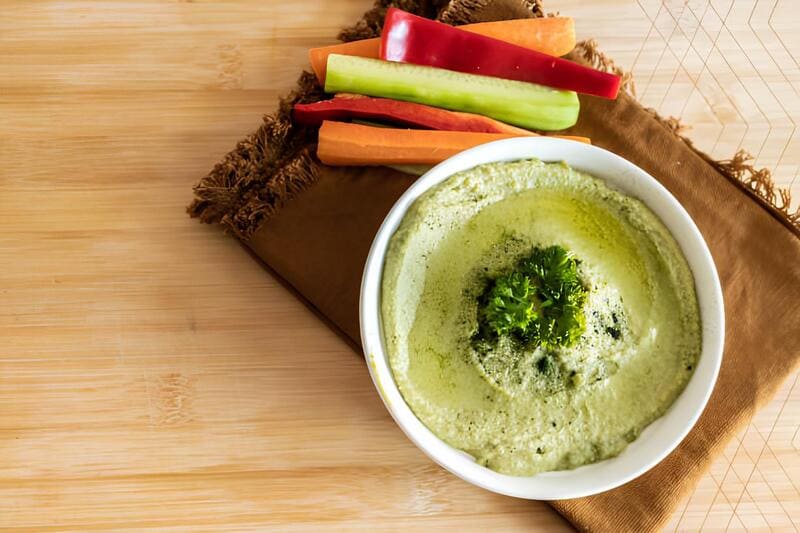
Broccoli Hummus is an innovative take on the traditional Middle Eastern dip. While hummus is typically made with chickpeas, this recipe incorporates broccoli, transforming this humble vegetable into the star of the show. This makes it perfect for those seeking a healthy and easy-to-make vegan dish.

This recipe, free of tahini, provides a unique spicy flavor profile, combining creamy white beans with aromatic roasted garlic and a hint of coriander and rosemary. It’s a standalone dish, perfect for gatherings or a nutritious meal, showcasing how simple ingredients can be turned into something truly special.

Ingredients

  • 1 head of broccoli (or tenderstem broccoli)
  • 1 can of white beans (such as cannellini or butter beans)
  • 1 head of garlic
  • 2-3 sprigs of rosemary
  • 1 teaspoon coriander seeds
  • 1/4 cup olive oil
  • Salt
  • Pepper
  • 1/2 cup pistachio nuts

Preparation

  1. Preheat your oven to 180 degrees Celsius (350 degrees Fahrenheit).
  2. Trim the broccoli and place it on a baking tray. Drizzle with olive oil, and season with salt and pepper. Slice the top off the garlic head, drizzle with oil, and place it cut side down on the tray.
  3. Roast the broccoli and garlic for about 15 minutes until the broccoli is tender and the garlic is caramelized.
  4. While the vegetables roast, place half the olive oil in a pan and heat gently. Add the coriander seeds and a pinch of rosemary, cooking just until fragrant without burning.
  5. Once the vegetables are done, squeeze the roasted garlic cloves out of their skins.
  6. In a food processor, combine the beans, roasted garlic, and the flavored olive oil. Blend until smooth but still slightly textured. Add unheated olive oil to adjust the consistency and flavor.
  7. Lightly toast the pistachio nuts on a tray in the oven for a few minutes until they are fragrant. Crush them using a pestle and mortar.
  8. To plate, spread the bean hummus on a serving platter. Top with the roasted broccoli and sprinkle the crushed pistachios over the dish. Finally, drizzle with a bit more olive oil before serving.

Did you know?

Broccoli Hummus is not only a delicious swap for traditional hummus but also a nutritional powerhouse. Broccoli is packed with vitamins C and K, fiber, and numerous antioxidants, making this dish a fantastic option for those focusing on a healthy diet. Hummus, believed to have originated in Egypt, has numerous regional variations. This modern twist pays homage to its roots while adding a contemporary flair. Interestingly, using white beans instead of chickpeas makes this dish creamier and a good source of protein, satisfying both vegans and non-vegans alike.

The use of roasted garlic adds a depth of flavor that’s both sweet and savory, perfectly balancing the natural bitterness of the broccoli. Olive oil, often called “liquid gold” in Mediterranean kitchens, not only enhances flavor but also provides heart-healthy fats.

Coriander seeds introduce a spicy zest that sets this dish apart and complements the rich, earthy notes of rosemary. The toasted pistachios add a delightful crunch, bringing exciting texture in every bite. This dish is the epitome of how easy and versatile cooking with simple, home-based ingredients can be while achieving gourmet-level results.

Egyptian Baladi Salad

Egyptian Baladi Salad Egyptian Recipe

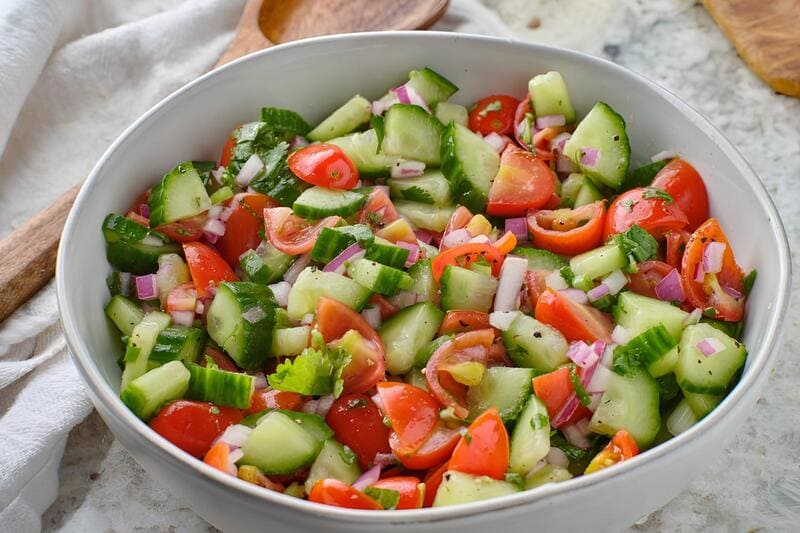
Salata baladi is a quintessential Egyptian side dish that has graced tables for generations. This traditional salad, often compared to the Lebanese fattoush, is a vibrant array of fresh vegetables combined with a tangy, zesty dressing. Known for its refreshing flavor and knack for cutting through rich dishes, it’s a staple in many Egyptian households.

Whether served alongside main courses or enjoyed on its own, salata baladi (sometimes referred to as Egyptian garden salad) is celebrated for its simplicity and balanced calories. Packed with crisp vegetables and fragrant herbs, it’s not just delicious but also a nutritionally rich addition to any meal. Let’s dive into making this authentic dish that embodies the essence of Egyptian cuisine.

Ingredients

  • 2 large tomatoes, diced
  • 1 cucumber, diced
  • 1 green bell pepper, diced
  • 1 small red onion, finely chopped
  • ½ cup fresh parsley, chopped
  • 2 tablespoons fresh mint, chopped
  • 2 tablespoons extra-virgin olive oil
  • 2 tablespoons lemon juice
  • 1 teaspoon ground cumin
  • Salt and pepper to taste

Preparation

  1. In a large bowl, combine the diced tomatoes, cucumber, green bell pepper, and red onion.
  2. Add the chopped parsley and fresh mint, mixing well to distribute the herbs evenly throughout the vegetables.
  3. In a small bowl, whisk together the extra-virgin olive oil, lemon juice, and ground cumin until emulsified.
  4. Pour the dressing over the vegetable mixture and toss gently to ensure all ingredients are well-coated.
  5. Season the salad with salt and pepper to taste, adjusting as necessary.
  6. Allow the salad to sit for about 10 minutes before serving to let the flavors meld together.

Did you know?

Salata baladi is not just a feast for the taste buds but also a powerhouse of nutrients. The fresh vegetables provide essential vitamins and minerals that contribute to overall health. The parsley and mint, apart from adding a burst of fresh flavor, bring antioxidants and anti-inflammatory properties to the table. This salad is often found accompanying heavier Egyptian dishes like koshari or grilled meats, providing a refreshing contrast and balance.

Interestingly, the use of cumin in the dressing is a nod to the Middle Eastern and North African culinary tradition, which often incorporates this earthy, aromatic spice. While salata baladi is inherently Egyptian, its simplicity and adaptability have made it popular in other Arab countries, albeit with slight regional variations.

Moreover, in an era where calories and health-conscious eating are a priority, this salad shines as a low-calorie option that doesn’t compromise on flavor. Whether you’re familiar with its Lebanese cousin or new to this Arabic delight, salata baladi promises a delightful addition to your culinary repertoire.

Embrace this dish at your next meal and experience the timeless flavors that have captivated hearts (and taste buds) across cultures and generations.

Egyptian Baked Sweet Potato

Egyptian Baked Sweet Potato Egyptian Recipe

Exploring the world of Egyptian cuisine is like embarking on a journey through time. Among the many beloved homegrown dishes, the Egyptian Baked Sweet Potato stands out, especially during the winter season. This humble yet hearty dish warms both hearts and homes, offering a delightful combination of sweetness and creaminess that’s truly comforting.

The recipe we’ll explore today is both easy and quick, making it ideal for those looking for fast bake ideas without compromising on flavor or nutrition. This rendition incorporates milk, sugar, and a touch of coconut, resulting in a uniquely Egyptian twist on a classic favorite. Let’s dive in!

Ingredients

  • 1.5 kg sweet potatoes
  • 1 cup milk (200 grams)
  • 3 tablespoons sugar
  • 1 tablespoon butter or ghee
  • 3 cups milk (for the cream layer)
  • 2 tablespoons cream chantilly
  • 3 tablespoons starch
  • 1/2 teaspoon vanilla extract
  • 3 tablespoons desiccated coconut
  • 2 tablespoons butter or ghee (for topping)

Preparation

  1. Soak the sweet potatoes in water briefly, then wash thoroughly to remove any dirt. Peel and wash again to ensure they are clean.
  2. Slice the sweet potatoes into circles of medium thickness.
  3. In a large pot, combine the sliced sweet potatoes, 1 cup of milk, 3 tablespoons of sugar, and 1 tablespoon of butter. Cook on high heat until the milk begins to boil.
  4. Reduce the heat to low, stirring occasionally, until the sweet potatoes are soft and start to break apart.
  5. Mash the sweet potatoes gently until they reach a smooth consistency. Add a bit more milk if the mixture appears too dry.
  6. Mix in 3 tablespoons of desiccated coconut.
  7. Preheat your oven to 180°C (350°F). Spread the mashed sweet potato mixture evenly into a baking dish.
  8. In a separate pot, combine 3 cups of milk, 3 tablespoons of sugar, 2 tablespoons of cream chantilly, 3 tablespoons of starch, and 1/2 teaspoon of vanilla. Stir well while cold.
  9. Heat the mixture on medium heat, stirring constantly until it thickens and begins to boil. Add 2 tablespoons of butter and stir until melted.
  10. Pour the creamy milk mixture over the sweet potatoes in the baking dish.
  11. Optionally, brush the top with a bit of extra ghee or butter for a golden finish.
  12. Bake in the preheated oven until the top is golden and set. Serve warm.

Did you know?

The Egyptian Baked Sweet Potato is also known in some families as “batats muhafa” (بَطَاطَا مُحَفَا), a popular winter street food in Egypt. Vendors can be found on street corners roasting sweet potatoes over coals, their fragrant aroma beckoning passersby. Another interesting fact is that sweet potatoes are packed with vitamins A and C, making this dish not just delicious, but also a healthy treat.

This quick and simple dessert can take on many variations. While coconut adds a modern twist, traditional versions may also include raisins or nuts for added texture and flavor. The beauty of this recipe lies in its versatility and ease, a true comfort food that’s perfect for cozy nights.

Finally, it’s worth noting that this dish is enjoyed warm but can also be quite appealing when served cold, making it a great dessert idea for different occasions. Give this Egyptian roasted delicacy a try, and it might just become your go-to winter treat too!

Exploring the world of Egyptian cuisine through dishes like Baked Sweet Potato offers a delectable peek into the culinary traditions and innovations that have been passed down through generations. Its diversity in preparation methods and ingredient combinations makes every bite a comforting and nostalgic experience.

Sweet Potato Hummus

Sweet Potato Hummus Egyptian Recipe

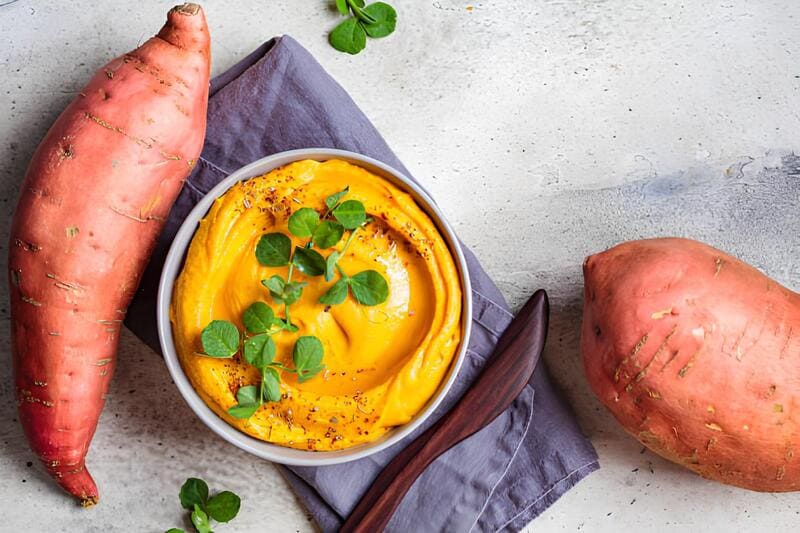
Sweet Potato Hummus is a delightful twist on the traditional chickpea-based spread. With its roots in Middle Eastern cuisine, hummus has been enjoyed for centuries, celebrated for its creamy texture and rich flavor. This sweet potato variant brings an Egyptian flair, offering a naturally sweet and subtly spicy alternative that pairs wonderfully with a variety of dishes.

Sweet potatoes provide a velvety base, enhanced by tahini, garlic, cumin, and a touch of chipotle pepper. This healthy and vegan option is perfect for those looking to diversify their hummus repertoire. The preparation is pleasantly simple, making it an ideal easy and quick recipe for any occasion. Spread it on toast or serve with crispy crackers for a satisfying snack.

Ingredients

  • 2 large sweet potatoes, cooked and very tender
  • 2 tbsp tahini
  • 2 cloves garlic, minced or crushed
  • 1 tsp kosher salt
  • 1 tsp ground cumin
  • ¼ tsp chipotle pepper
  • 2 tbsp olive oil
  • Juice of 1 lemon (or lime)
  • Water, as needed
  • Olive oil for drizzling
  • Freshly chopped parsley for garnish
  • Cayenne or chili flakes for garnish

Preparation

  1. Cook the sweet potatoes until they are very soft. You can boil, bake, microwave, or even grill them.
  2. Once the sweet potatoes are cool enough to handle, scoop the flesh into a bowl, ensuring they are tender enough to mash easily.
  3. Add the tahini, minced garlic, kosher salt, ground cumin, chipotle pepper, olive oil, and lemon juice to the bowl.
  4. Use a potato masher to mash the mixture until it reaches your desired consistency. For a smoother texture, use a food processor or pass through a fine mesh strainer.
  5. Gradually mix in cold water, a tablespoon at a time, to lighten the texture.
  6. Adjust the seasoning, adding more salt if needed, and make sure it chills in the fridge for a few hours before serving.
  7. Before serving, create a small well in the center and drizzle with olive oil. Garnish with cayenne or chili flakes and freshly chopped parsley.
  8. Serve with bread, crisp crackers, or toasted pita.

Did you know?

Sweet potatoes are not just an excellent alternative to chickpeas in hummus; they’re also jam-packed with nutrients. Rich in vitamin A, fiber, and antioxidants, sweet potatoes help promote eye health and digestive wellness.

Their natural sweetness pairs surprisingly well with the nutty tahini and zesty lemon, offering a unique flavor profile reminiscent of a roasted red pepper hummus. Another fascinating fact: in Egyptian culture, tahini (or tahina) is a staple, oftentimes used in sauces, dips, and even desserts. If you prefer a hummus without tahini, you can substitute with Greek yogurt or leave it out for a different yet equally delicious experience.

Lastly, sweet potato hummus is perfect for those following a vegan diet. It’s easily customizable to be as spicy or mild as desired. Whether you’re spreading it on toast for a quick snack or serving it alongside veggies, this dish stands out as one of the best variants of hummus you can try. So, next time you find your pantry chickpea-less, reach for sweet potatoes and experience a culinary revelation!

Beetroot Hummus

Beetroot Hummus Egyptian Recipe

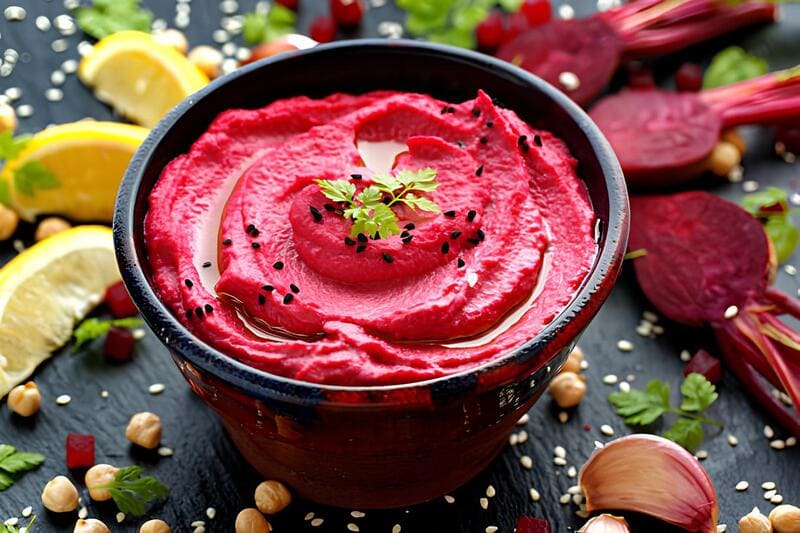
Beetroot Hummus has been a cherished part of Middle Eastern cuisine, beloved for its captivating color and robust flavor. This variation on traditional hummus is as healthy as it is visually striking, offering a blend of earthy beetroots, nutty tahini, and a touch of spicy cumin. It’s an easy and vegan dish that can elevate any gathering with its unique taste and vibrant hue.

Primarily served as an appetizer, Beetroot Hummus is best paired with warm pita bread or toast. It’s equally delicious when served with fresh veggies or as a spread in sandwiches. The pomegranate molasses introduces both sweet and tangy notes, making it a multifaceted dip that will leave your guests reaching for more. Enjoy this healthy, spicy, and best version of beetroot hummus that can be adjusted without tahini for those with sesame allergies.

Ingredients

  • 2 medium cooked beetroots, chopped
  • 1 garlic clove
  • Juice of 1/2 lemon
  • 1 tsp cumin seeds
  • 2 tbsp pomegranate molasses
  • 2 tbsp tahini (optional for a nutty flavor)
  • Sea salt to taste
  • Black pepper to taste

Preparation

  1. Place the chopped cooked beetroots into a food processor.
  2. Crush the garlic clove with the back of a knife, remove the skin, and roughly chop it before adding it to the processor.
  3. Squeeze the juice of half a lemon into the mixture.
  4. In goes the cumin seeds; sprinkle them over the beetroot and garlic.
  5. Add the pomegranate molasses, bringing a sweet and sticky contrast to the mix.
  6. If desired, add a generous spoonful of tahini for a rich, nutty flavor. If not, this step is optional for creating the best flavor.
  7. Season with sea salt and a pinch of black pepper according to taste.
  8. Blend all ingredients until smooth and creamy.
  9. Serve the hummus in a bowl, garnish with toasted sesame seeds, and a drizzle of pomegranate molasses.
  10. Accompany with warm pita bread, toast, or fresh veggies for dipping.

Did you know?

Beetroot Hummus, known as Beetroot Dip in some cultures, has health benefits thanks to the nutrient-rich ingredients it contains. Beetroots are a fantastic source of fiber, manganese, and potassium while also containing powerful antioxidants which are good for your heart. The addition of cumin seeds not only enhances the earthy flavor but also aids in digestion and improves immunity.

Tahini, a staple in Middle Eastern cuisine, is made from ground sesame seeds and is packed with minerals such as magnesium and zinc. Whether included or omitted based on preference or dietary needs, it adds a lovely complexity to the dish.

Pomegranate molasses is a versatile ingredient often used in Middle Eastern dishes. It lends a tangy sweetness that can elevate simple recipes to something extraordinary. Not only is it a fantastic addition to salads and dressings, but it can also be used as a marinade or even in drinks.

Whether you are looking for a healthy and delicious vegan dip or a colorful addition to your appetizer spread, Beetroot Hummus is a delightful choice. Its spicy yet sweet flavor profile ensures it’s a crowd-pleaser at any gathering.