Sweet Bread Rolls (Shoreek)

Sweet Bread Rolls Egyptian Recipe

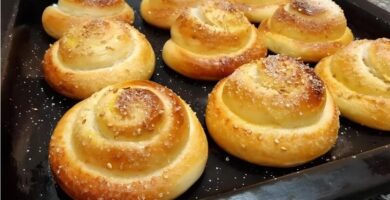
Every culture has its own unique take on yeast rolls, and Egyptian Shoreek is no exception. These sweet bread rolls offer a soft, delightful treat perfect for dinner or as a snack. Their unique flavor profile, attributed to a hint of vanilla and a sprinkle of sanding sugar, makes them stand out among traditional bread rolls.

Shoreek is a beloved treat in Egypt, often enjoyed with a cup of tea or coffee. These rolls are quick and easy to make, yet are considered some of the best homemade bread options you can serve. The combination of a soft interior with a slightly crisp exterior offers a perfect texture that everyone will love.

Ingredients

  • 2 cups all-purpose flour
  • 1/3 cup sugar
  • 1 teaspoon baking powder
  • 1 tablespoon dry yeast
  • 1/8 teaspoon salt
  • 1/4 cup melted butter
  • 1 beaten egg
  • 1/2 teaspoon vanilla
  • 1 cup warm milk (use between 3/4 cup to 1 cup as needed)
  • Additional flour for kneading (if necessary)

For the glaze

  • 1 egg
  • 1 tablespoon milk
  • 1/8 teaspoon vanilla
  • Sanding sugar (optional)

Preparation

  1. Mix together the 2 cups of all-purpose flour, 1/3 cup sugar, 1 teaspoon of baking powder, 1 tablespoon of dry yeast, and 1/8 teaspoon of salt in a bowl.
  2. In another bowl, mix the 1/4 cup melted butter, 1 beaten egg, and 1/2 teaspoon vanilla.
  3. Combine the wet ingredients with the dry ingredients.
  4. Gradually add the warm milk (3/4 cup to 1 cup) into the mixture, stirring lightly to form a sticky batter.
  5. Transfer the batter into a greased bowl, cover, and let it rise for two hours.
  6. After the dough has risen, sprinkle about 1 cup of flour on a surface and knead the dough lightly if the batter is too sticky.
  7. Divide the dough into six equal pieces.
  8. Roll each piece into a 12-inch-long rope, then shape each rope into a coil and tuck the end underneath.
  9. Place the shaped dough pieces onto a cookie sheet lined with parchment paper.
  10. Cover with plastic wrap and let them sit for 10 minutes.
  11. For the glaze, beat 1 egg with 1 tablespoon of milk and 1/8 teaspoon of vanilla. Brush it over the rolls and sprinkle with sanding sugar if desired.
  12. Bake in a preheated oven at 350°F and check after 12 minutes. They usually bake between 15 and 20 minutes.
  13. Let the bread sit for about five minutes before serving.

Did you know?

Shoreek is not just popular as a simple bread roll but also holds cultural significance in Egypt. Often enjoyed during festive occasions, this sweet bread roll is akin to comfort food for many Egyptians. The vanilla glaze that tops these rolls helps them achieve a golden-brown hue and adds a subtle, aromatic sweetness.

The use of yeast in Shoreek plays a crucial role in creating the soft, fluffy texture. Yeast fermentation produces carbon dioxide, which causes the dough to rise, giving these rolls their airy interior. Interestingly, the process of letting the dough rest for two hours allows the yeast to fully activate and helps in achieving the desired softness.

In various parts of Egypt, you might find Shoreek flavored with different spices like anise or enhanced with a touch of honey, demonstrating the versatile and adaptable nature of this traditional recipe. Whether you serve these rolls at dinner or enjoy them as a quick snack, their homemade charm is undeniable.
Egyptian Banana Milkshake (Easy)

Egyptian Banana Milkshake Egyptian Recipe

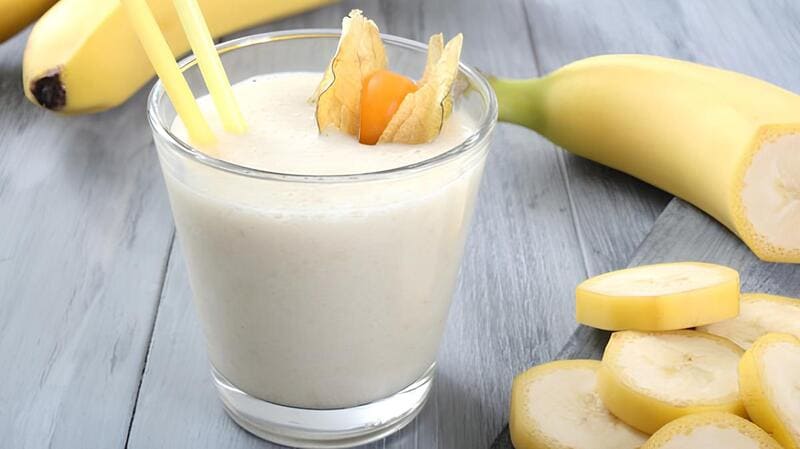
Banana milkshake, or smoothie, is an Egyptian staple enjoyed by many. This simple yet healthy drink offers a creamy blend of ripe bananas and sweet syrup, perfect to start your day with a burst of energy. Providing benefits that include vitamins and minerals, this milkshake is both delicious and nutritious.

This easy recipe can be made in no time, making it an ideal choice even for those with busy mornings. Not only does it keep the calories in check, but it also offers a taste of tradition that’s hard to resist. Let’s uncover how to make the best Egyptian banana milkshake!

Ingredients

  • 2 ripe bananas
  • 1 cup cold milk
  • 1 tablespoon sugar or honey
  • 1 teaspoon vanilla extract
  • Ice cubes (optional)

Preparation

  1. Peel and chop the bananas into smaller pieces.
  2. Add the chopped bananas, cold milk, sugar or honey, and vanilla extract into a blender.
  3. Blend the ingredients until smooth and creamy.
  4. If you prefer a colder drink, add a few ice cubes and blend again until the ice is crushed.
  5. Pour the banana milkshake into a glass and serve immediately.

Did you know?

The origin of the banana milkshake in Egyptian cuisine likely stems from the ancient tradition of incorporating locally grown ingredients into refreshing beverages. Bananas are a rich source of potassium and vitamin C, making them incredibly beneficial for maintaining good health. Often enjoyed as a smoothie, this drink is known for its simplicity and versatility. Swap out milk with almond or oat milk for a dairy-free alternative, and it’s just as delicious.

The syrup used can vary, with some opting for honey instead of sugar for a natural sweetness. With a low calories count, this milkshake doesn’t just satisfy your taste buds; it’s also a fantastic way to enjoy a filling drink without guilt. The best part about this recipe is how incredibly easy it is to adapt to your preference—add a touch of cinnamon for an extra flavor twist, or blend in other fruits for a nutrient-packed smoothie experience.

Ashta Cream (Easy)

Ashta Cream Egyptian Recipe

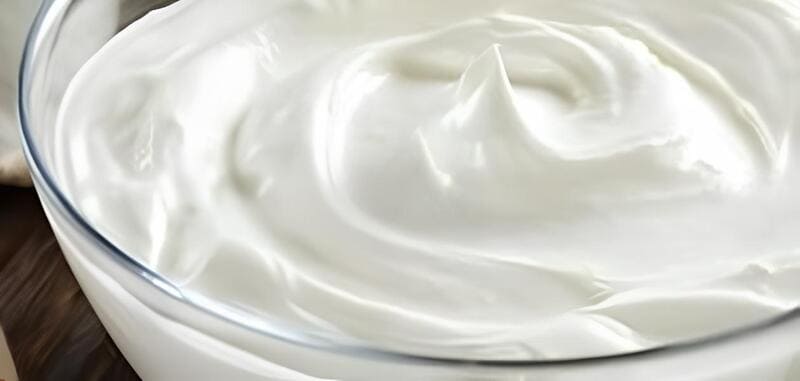
Celebrated for their lush texture and versatile usage, Ashta cream—also known as qashta or qeshta—is a cornerstone of Middle Eastern desserts. Revered during festive seasons like Ramadan, this thick, clotted cream is an essential layer in many Arabic sweets, bringing a rich, creamy experience to delights such as baklava and kunafa.

This homemade Ashta cream version is simple yet profoundly satisfying. Its recipe uses common kitchen staples, ensuring accessibility. Much like a symphony, each ingredient contributes its unique notes, culminating in a harmonious, creamy concoction. This recipe offers a delightful balance of textures and flavors, encouraging you to explore the delicious landscape of Egyptian desserts.

Ingredients

  • 1 liter of milk
  • 2 tablespoons vinegar
  • 2 tablespoons cornstarch
  • 2 tablespoons flour
  • 1 tablespoon butter
  • ½ teaspoon mastic (optional)
  • Water (as needed)

Preparation

  1. Heat the milk in a large pot over high heat until nearly boiling.
  2. Add the vinegar to the pot and stir until the milk curdles and separates into solids and whey.
  3. Allow it to boil slowly for 5 minutes, then strain the curds using a cheesecloth or fine strainer.
  4. In a separate saucepan, mix the strained curds with the cornstarch and flour.
  5. Gradually add the milk while stirring continuously over medium heat until the mixture thickens.
  6. Remove from heat once the mixture reaches a thick, creamy consistency.
  7. Stir in the butter and finely crushed mastic, if using, until fully incorporated.
  8. Spread the mixture in a tray, cover, and let it cool to room temperature before refrigerating for at least an hour.

Did you know?

The origins of Ashta cream stem from centuries-old traditions in the Middle East, where it has been a luxurious topping or filling in numerous pastries. Known as “qeshta” in Egyptian and Levantine cuisines, this cream is distinct from Western equivalents due to its unique preparation methods. The process of curdling milk with vinegar to create this thick layer is akin to making clotted cream but imbued with regional nuances.

When it comes to cultural significance, Ashta cream is indispensable during religious celebrations such as Ramadan. It is generously layered in sweets like Kunafa and Othamaliyah, each bite evoking communal warmth and festive spirits. As for its versatility, besides being a part of intricate desserts, Ashta cream can also be a simple yet indulgent topping for fruits, adding a creamy contrast.

Interestingly, the caloric content of Ashta cream can vary widely based on how it’s prepared or used. While indulgent, there are ways to prepare a more healthy version by adjusting the amount of butter or using low-fat milk. Nevertheless, this delightful cream remains a beloved staple in Middle Eastern households, contributing a rich and irresistible flavor profile to any dish it graces.

Batbout (Moroccan Pita Bread)

Batbout Egyptian Recipe

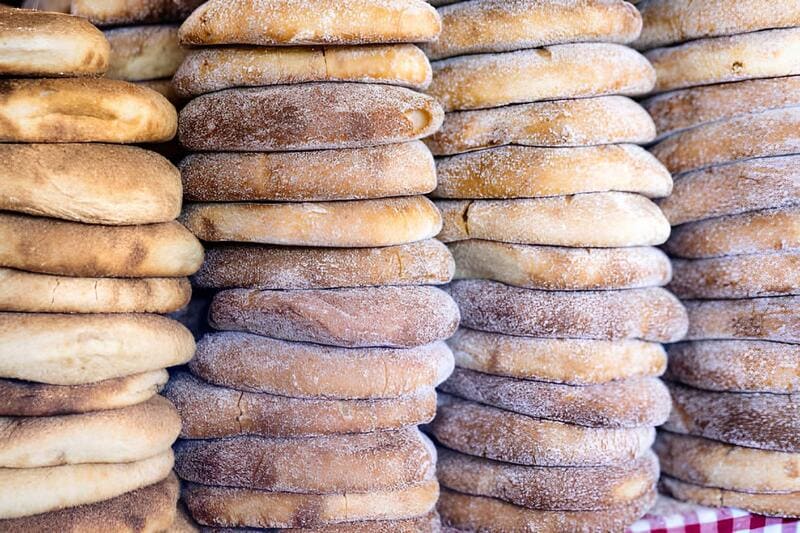
Batbout, also known as Moroccan Pita Bread, is a multidimensional delight. Its origins trace back to the heart of North African cuisine, notably Morocco. Recognized for its versatile use, this bread is a staple in many households and is celebrated for its quick preparation and versatility.

The bread’s flavor is mild yet slightly nutty, thanks to the combination of durum and white flours. When cooked, batbout puffs up beautifully, leaving a pocket that’s perfect for stuffed delicacies. This pocket can be filled with savory or sweet ingredients, making it a favorite across generations.

Ingredients

  • 500g white flour
  • 250g durum flour (Fino flour)
  • 1.5 tablespoons granulated sugar
  • 1.5 tablespoons yeast (1 tablespoon if hot weather)
  • 1/2 teaspoon salt
  • Water (approximately 250-300ml)

Preparation

  1. Mix the white and durum flours together in a large bowl.
  2. Add granulated sugar and yeast to the flour mixture and blend well.
  3. Slowly add water while mixing until a dough forms. The dough should be slightly sticky.
  4. Knead the dough until it is smooth and elastic (around 10 minutes by hand or 5 minutes in a kneading machine).
  5. Add salt and continue to knead for an additional 5 minutes.
  6. Divide the dough into small, evenly sized balls based on the desired size of your bread.
  7. Roll each ball lightly in a bit of flour and flatten them slightly.
  8. Place on a floured surface, cover with a cloth, and let them rest for 15-20 minutes to ferment.
  9. Heat a non-stick frying pan or a griddle over medium heat.
  10. Cook each piece of dough on the pan, flipping continuously to ensure even cooking and puffing, until both sides are golden brown and puffed up.
  11. Remove from heat and let cool slightly before serving.

Did you know?

Batbout, or Matlou in Tunisia, is quite similar to Egyptian “Baladi” bread in its preparation and uses. This bread is a true Mediterranean staple that showcases the ingenuity of regional cuisines by minimizing food wastage through its fermentation process. Historically, the wide availability of both durum and white flour has made batbout a household essential.

Batbout is often made in mini versions, making them perfect for individual servings or as bread for stuffed appetizers. A popular way to serve mini batbouts is by filling them with savory mixtures like spiced ground meat, olives, and roasted vegetables, or even sweet combinations like honey and nuts. The bread’s ability to maintain its softness for hours makes it an ideal choice for picnics or as a part of a mezze platter.

Learning how to make batbout is an excellent entry point for those interested in Moroccan or Tunisian cuisine. Its simple ingredient list and straightforward preparation mean that you get to enjoy the deep culinary traditions of North Africa right at home. Whether paired with stews, used for sandwiches, or enjoyed plain, batbout remains a versatile and beloved part of the Mediterranean culinary landscape.

Egyptian butter cookies recipe

Egyptian Butter Cookies (Ghriba)

Egyptian butter cookies recipe

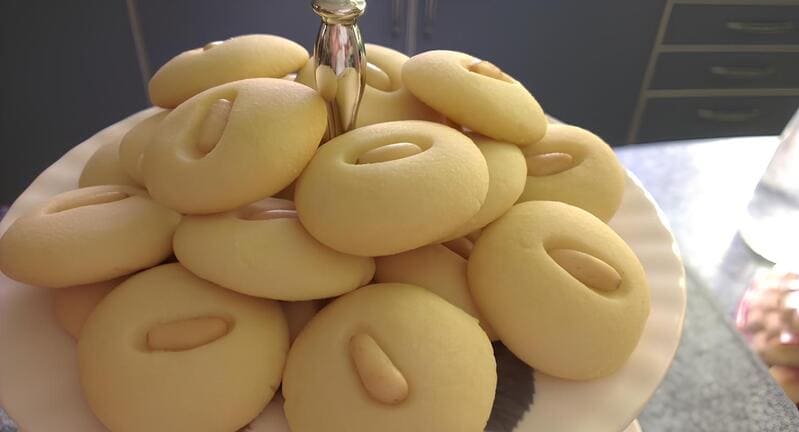
Ghoriba is a beloved Egyptian sweet, often enjoyed during special occasions and holidays, including Eid. These tender, melt-in-your-mouth cookies have an irresistible blend of rich, nutty flavors that come from their primary ingredient: ghee. Ghoriba dates back centuries and is a staple biscuit across numerous Middle Eastern cuisines, known by alternate names like “Ghorayeba” or “Ghraybeh.”

The preparation process of Ghoriba is simple yet meticulous, ensuring the cookies maintain their delicate texture and signature taste. They’re easy to make but require attention to detail, from the quality of ghee to the accurate measurements of sugar and flour. Explore a bit of Egypt by baking these delightful cookies that are bound to become a staple in your own household.

Ingredients

  • 500g (4-5 cups) of flour
  • 250g (1 1/4 cups) of solid ghee at room temperature
  • 200g (1 cup) of powdered sugar
  • 50g (1/4 cup) of powdered milk
  • 1 envelope of vanilla sugar
  • Optional: whole almonds or pistachios for decoration

Preparation

  1. In a large mixing bowl, combine 250g of ghee with 200g of powdered sugar. Mix until creamy.
  2. Add 50g of powdered milk and 1 envelope of vanilla sugar to the ghee and sugar mixture. Mix until well incorporated.
  3. Gradually add 500g of flour, mixing continuously until a soft dough forms. The dough should be smooth and cohesive.
  4. Cover the dough with plastic wrap and refrigerate for at least 1-2 hours to firm up.
  5. Preheat your oven to 160°C (320°F). Line a baking sheet with parchment paper.
  6. Remove the dough from the refrigerator and form small balls (approximately 5 grams each) by rolling them between your palms.
  7. Place the dough balls on the baking sheet. Gently press in the center of each ball with a whole almond or pistachio if desired.
  8. Bake in the preheated oven for 10 minutes. Check for a golden hue at the bottom to confirm if ready.
  9. Let the cookies cool completely on a wire rack before serving or storing.

Did you know?

Ghoriba has a rich history that spans across various cultures, with each region adding its own local twist. In Morocco, they might incorporate almond flour for a different texture, earning them the name “Moroccan ghoriba.” In Egypt, the use of high-quality ghee is essential to achieving the traditional flavor and delicate texture of these cookies. The word “Ghoriba” itself means “stranger” in Arabic, referring to its unique, exotic taste that stands out among other sweets.

These cookies are particularly popular during festivals like Eid, serving as a sign of hospitality and joy. The simplicity of their ingredients—flour, ghee, and sugar—highlights the importance of quality and technique in Middle Eastern cooking. Besides their delightful texture, Ghoriba cookies are also visually appealing with decorative nuts in their center, making them a perfect accompaniment to a cup of coffee or tea.

Now that you know the backstory and techniques behind Ghoriba, you can appreciate how these traditional treats blend cultural heritage and culinary craftsmanship, representing a sweet slice of Egypt on your plate. Enjoy these delectable biscuits and share them with loved ones, celebrating the flavors and traditions they bring.

Samosa

Samosa Egyptian Recipe

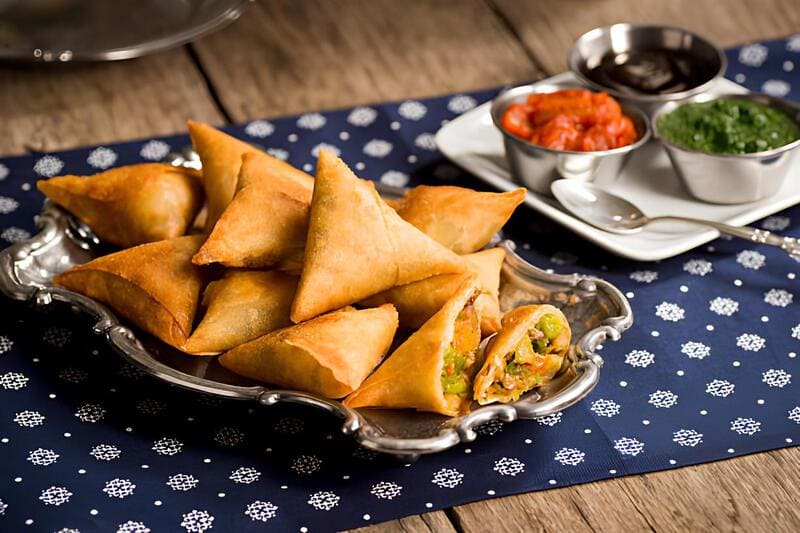
Sambusas, popular in Middle Eastern and African cuisine, particularly during Ramadan, are known for their crispy exterior and diverse fillings. This recipe explores the vegetarian aspect of this versatile snack, charming in simplicity yet rich in flavor. The dough’s tenderness and the savory fillings make it a much-loved appetizer, perfect for any gathering or a quick family treat.

Traditionally enjoyed in Egypt and many other Arabic cultures, sambusas (or sambousek) often grace festive tables. Variations include fillings like meat, cheese, chicken, and vegetables. Their golden, crunchy exterior conceals moist, seasoned fillings, making them delightful for kids and adults alike. Here, we delve into a vegetarian version that’s sure to impress.

Ingredients

  • 4 cups all-purpose flour
  • 2 tablespoons cornstarch
  • 1 teaspoon salt
  • ½ cup vegetable oil
  • 1 ¼ cups warm water
  • Oil for frying

Vegetarian Filling:

  • 2 tablespoons vegetable oil
  • 1 medium onion, finely chopped
  • 1 cup finely chopped carrots
  • 1 cup finely chopped bell peppers
  • 1 cup cooked peas
  • Salt and pepper, to taste
  • 1 teaspoon ground cumin
  • ½ teaspoon ground coriander
  • 2 tablespoons finely chopped parsley

Preparation

  1. In a large bowl, combine flour, cornstarch, and salt. Gradually add vegetable oil and mix until the dough is crumbly.
  2. Slowly add warm water, mixing and kneading until a smooth, pliable dough forms. Cover and rest for 30 minutes.
  3. Heat 2 tablespoons of oil in a pan over medium heat. Add chopped onions and sauté until golden.
  4. Add carrots, bell peppers, and cooked peas. Season with salt, pepper, cumin, and coriander, cooking until vegetables are tender.
  5. Stir in chopped parsley, remove from heat, and let the filling cool.
  6. Divide rested dough into small balls. Roll each ball into a thin circle on a lightly floured surface.
  7. Place a spoonful of filling in the center of each circle, fold over to create a half-moon shape, and press edges to seal. You can use water to help seal the edges.
  8. Heat oil in a deep frying pan over medium heat. Fry sambusas in batches until golden brown and crisp on both sides. Drain on paper towels.
  9. Serve hot with your favorite dipping sauce.

Did you know?

Sambusas, known as sambousek in many Arabic-speaking countries, are not just delicious snacks but also bear cultural significance. They are staples during Ramadan, as they provide much-needed energy after a day of fasting. The various fillings symbolize the diversity and adaptability of this dish, accommodating local ingredients and preferences.

In Egypt, sambusas are often prepared with simple fillings like cheese or vegetables due to their economical and nutritious nature. This makes them a practical choice for bulk preparation, especially for large family gatherings.

Interestingly, the methods of shaping and sealing the sambusas can vary across regions, with techniques handed down through generations. Careful attention to the dough’s thickness ensures a flaky, crunchy texture without becoming too greasy, preserving the snack’s light and crispy character.

By exploring different fillings and preparation methods, you can bring a touch of Egyptian and broader Middle Eastern culinary tradition into your home.

Egyptian Eid Cookies

Egyptian Eid Cookies Egyptian Recipe

Egyptian Eid cookies, commonly known as Kahk, are a cherished treat especially popular during the holy month of Ramadan and Eid celebrations. These delightful biscuits are known for their crumbly texture, aromatic flavors, and a dusting of powdered sugar. Originating from ancient times, they represent the joyous spirit of gatherings and festivities.

These cookies come together in a wonderfully easy and simple process, combining the richness of butter and the unique yet mild flavor of vanilla. Whether you’re a seasoned baker or a novice, this recipe guides you on how to make authentic Egyptian biscuits that will be the star of your celebrations.

Ingredients

  • 125 grams (1/2 cup) butter, softened
  • 80 grams (1/2 cup) powdered sugar
  • 1 egg, room temperature
  • 2 grams (1/2 tsp) vanilla extract
  • 300 grams (1 1/2 cups) cornstarch
  • 1 pinch of salt
  • 1/4 tsp baking powder

Preparation

  1. Preheat the oven to 160°C (320°F).
  2. In a large bowl, cream the softened butter with the powdered sugar using a hand mixer until light and fluffy.
  3. Add the egg and vanilla extract to the butter-sugar mixture and mix well.
  4. Gradually mix in the cornstarch, baking powder, and salt, combining until a soft dough forms.
  5. Divide the dough into small portions and shape them into your desired forms—traditional balls, rolls, or braids.
  6. Place the shaped cookies onto a baking sheet lined with parchment paper.
  7. Chill the shaped dough in the freezer for a few minutes to help retain their shape while baking.
  8. Bake in the preheated oven for about 25 minutes, or until the edges are just starting to turn golden.
  9. Let the cookies cool completely before decorating or serving.

Did you know?

Kahk, also known as fancy cookies, have a long-standing tradition in Arabic cultures as part of celebratory meals.

Egyptian families often gather to bake large batches together, emphasizing the communal and festive nature of these treats. The key to achieving the perfect smooth and melt-in-your-mouth cookies is ensuring that the butter is soft but not melted, and sifting the powdered sugar and cornstarch before mixing to avoid lumps.

Interestingly, variations of these cookies can be found in different regions, sometimes incorporating fillings like dates, nuts, or special spices. The use of cornstarch instead of flour gives them their distinctive, tender texture, making them a cheap yet luxurious option for festive baking.

In ancient Egypt, these cookies were actually discovered in tombs, dating back to the Pharaohs, signifying their deep cultural roots. Today, they still hold a significant place in many homes during Ramadan and Eid, bridging the gap between ancient traditions and modern celebratory practices.

Lokma or Zalabia

Lokma or Zalabia Egyptian Recipe

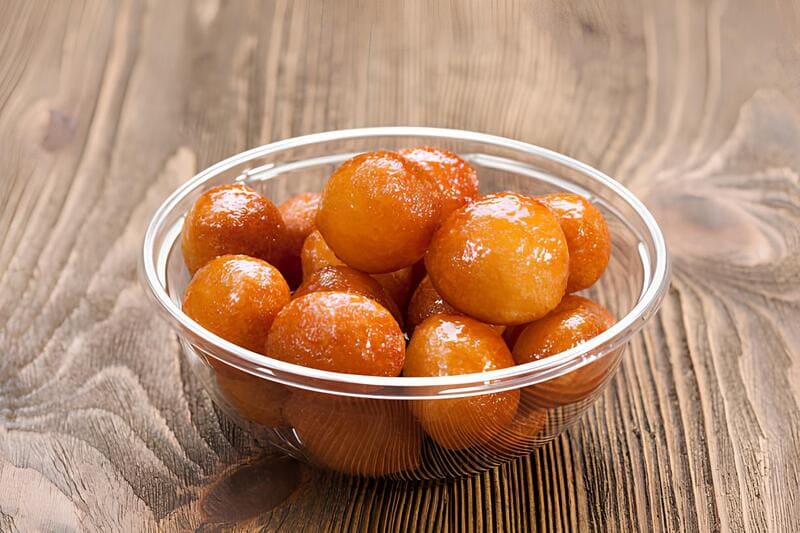
A cherished gem in Egyptian cuisine, Lokma, also known as Zalabia or Loukoumades, holds a special place in the hearts of many. These golden, sweet dumplings with a crispy exterior and soft interior are a beloved treat, often enjoyed during celebrations and gatherings. This traditional dessert embodies a unique blend of history and flavor, symbolizing prosperity and joy in many Middle Eastern households.

With its delightful light and fluffy texture, Lokma delivers a burst of sweetness in every bite, thanks to its syrupy coating. The perfect balance of crunch and tenderness makes it irresistible. Whether you’re familiar with this dessert or trying it for the first time, the effortless preparation method will make it a staple in your menu. Let’s dive into the art of making these authentic Egyptian dumplings.

Ingredients

  • 2 cups all-purpose flour
  • 2 tablespoons powdered milk
  • 2 tablespoons starch
  • 1 tablespoon sugar
  • 1 teaspoon instant yeast
  • 1/4 teaspoon baking powder
  • 1 pinch salt
  • Warm water (1-2 cups, as needed)
  • 2 tablespoons white honey (optional)
  • Oil, for frying
  • Syrup: 3 cups sugar, 1 1/2 cups water, a squeeze of lemon juice

Preparation

  1. In a large mixing bowl, combine the flour, powdered milk, starch, sugar, yeast, baking powder, and salt. Mix well.
  2. Gradually add warm water while stirring, until a runny, smooth dough forms.
  3. Optionally, add two tablespoons of white honey to the dough for extra flavor.
  4. Cover the bowl and let the dough ferment for 1.5 to 2 hours, until it doubles in size.
  5. Prepare the syrup by dissolving sugar in water and bringing it to a boil. Add a squeeze of lemon juice and let it cool.
  6. Heat oil in a deep frying pan over medium heat until hot.
  7. Using a spoon or a piping bag, drop small rounds of dough into the hot oil. Fry until golden brown and crispy.
  8. Remove the dumplings from the oil and drain on paper towels.
  9. While still warm, dip the dumplings in the prepared syrup, ensuring they are well-coated.
  10. Serve immediately with powdered sugar, Nutella, or even a drizzle of lotus sauce for added sweetness.

Did you know?

The origins of Lokma date back centuries, making it a dessert rich in history and heritage. Originally, Lokma was called “loukoumades” in ancient Greece, and was served to winners of the Olympic games as a symbol of victory and joy. This dessert has transcended borders and cultures, appearing in various forms across the Middle East, Turkey, and the Mediterranean.

In Egypt, these sweet treats are particularly popular during the month of Ramadan, where they’re enjoyed as part of the Iftar meal to break the fast. The name “lokmat al-qadhi” translates to “judge’s morsel,” emphasizing how every bite delivers a small but impactful taste of satisfaction.

Crisp on the outside yet melt-in-your-mouth soft on the inside, Lokma showcases the beauty of simplicity in cooking. The dough’s elasticity is key to achieving the perfect texture, and the use of warm water aids in this fermentation process.

Additionally, frying twice, as some prefer, enhances their crispiness, making them a versatile recipe piece to experiment with to suit your texture preference. Whether you enjoy them plain or with a drizzle of your favorite sweet topping, Lokma surely brings delight to any occasion.

Maamoul (Date Cookies)

Maamoul Egyptian Recipe

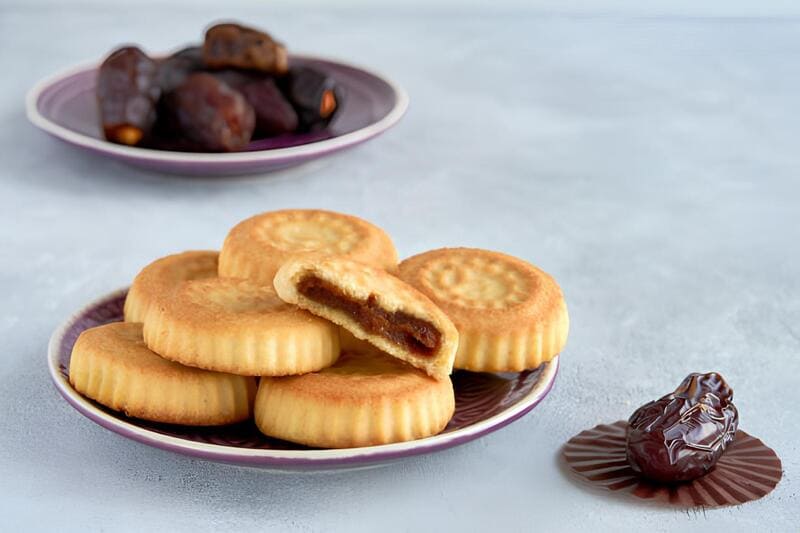
Maamoul, a traditional delicacy, holds a special place in many Middle Eastern cuisines, including Egyptian and Lebanese cultures. These date-filled, buttery cookies are often enjoyed during religious festivals like Eid, adding sweetness to celebratory moments. Renowned for their rich, nutty aroma and delicate texture, Maamoul cookies are a symbol of hospitality and warmth.

The flavor profile of Maamoul is a delightful blend of buttery richness and the natural, caramel-like sweetness of dates, often enhanced by hints of cinnamon. Whether you’re a novice baker or an experienced chef, this easy-to-make recipe ensures you can prepare the best Maamoul, showcasing the centuries-old tradition rooted in its origin.

Ingredients

  • 2 cups butter
  • 1 cup powdered sugar
  • 1 cup vegetable oil
  • 1 cup powdered milk
  • 2 eggs
  • Vanilla (powder or liquid)
  • 1 kilogram biscuit flour
  • 1/2 teaspoon baking powder
  • 500 grams Ajwa/date paste
  • 4 tablespoons butter or oil (for the date filling)
  • 1/2 teaspoon cinnamon powder

Preparation

  1. In a large bowl, mix together 2 cups of butter and 1 cup powdered sugar until well combined.
  2. Stir in 1 cup vegetable oil, followed by 1 cup powdered milk. Mix well.
  3. Add 2 eggs and a bit of vanilla, then continue mixing until smooth.
  4. In another bowl, combine 1 kilogram biscuit flour and 1/2 teaspoon baking powder.
  5. Gradually add the butter mixture to the flour mixture, stirring continuously to form a dough.
  6. Knead the dough lightly and let it rest for 15 minutes.
  7. For the filling, mix 500 grams of Ajwa/date paste with 4 tablespoons butter or oil and 1/2 teaspoon cinnamon powder until the dates are very soft.
  8. Form the date mixture into small balls.
  9. Take a small piece of dough, flatten it, and enclose a date ball inside.
  10. Use Maamoul molds to shape the cookies, taking any design available.
  11. Place the shaped Maamoul on a baking tray.
  12. Bake on the bottom shelf of the oven at 200°C for 20 minutes, then turn on the grill to brown the top for a gorgeous color.
  13. Enjoy the soft and fluffy goodness of your Maamoul!

Did you know?

Maamoul has a history that dates back to the ancient civilizations of the Middle East. The word “Maamoul” itself is derived from the Arabic root meaning “filled” or “stuffed,” indicating the cookie’s signature feature. Traditionally, Maamoul cookies were made during special occasions like Eid for Muslims or Easter for Christians, symbolizing both celebration and unity.

Maamoul’s intricate molds, often carved from wood, are a unique feature, imparting artistic designs on each cookie. These molds come in various patterns and sizes, adding visual charm to these delectable treats. The use of Ajwa dates, known for their superior quality and rich flavor, is believed to have medicinal benefits, contributing to the overall healthfulness of the cookies.

In Lebanese cuisine, Maamoul is also known as Kahk, and it sometimes includes fillings of pistachios or walnuts alongside dates. No matter the variation, the essence of Maamoul remains the same – a heartwarming, sweet bite that connects us to rich culinary traditions and cultures. So, the next time you’re enjoying these date-filled delights, remember you’re partaking in a piece of culinary history that transcends borders and brings people together.