Mexican cuisine, known for its vibrant flavors and rich history, has become a favorite worldwide. Quesadillas are a traditional Mexican dish, consisting of a tortilla filled with cheese and other ingredients. Chef Ahmed has tailored this recipe to suit Egyptian palates, providing a unique fusion.
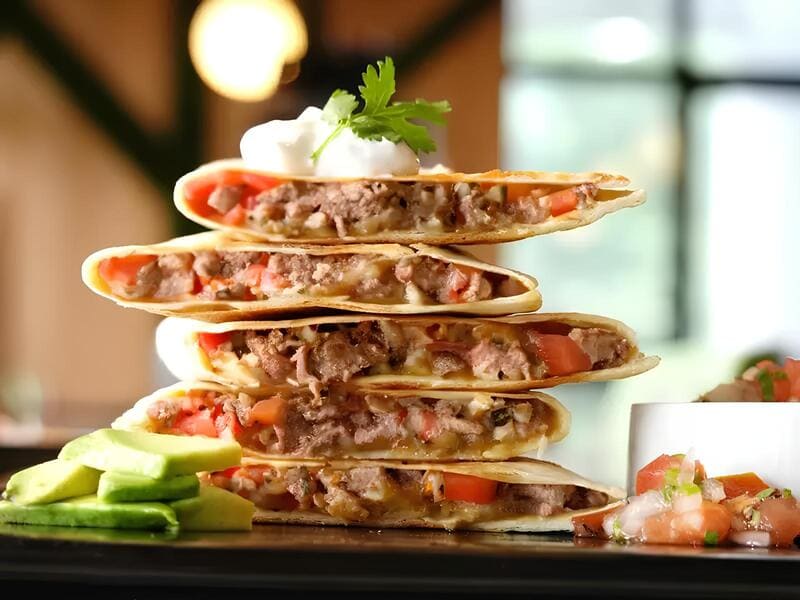
The chicken quesadilla combines succulent chicken with aromatic spices and fresh vegetables, all encased in a crispy tortilla. This dish, with its melted cheese and flavorful filling, makes an ideal quick meal or snack. It’s a delightful blend of Mexican tradition and Middle Eastern ingenuity.
Ingredients
- 2 large chicken breasts, cut into small pieces
- 1 tsp salt
- 1 tsp onion powder
- 1 tsp garlic powder
- 1 tsp paprika
- 2 tbsp vegetable oil
- 1 medium onion, chopped
- 2 medium tomatoes, chopped
- 1/2 red bell pepper, chopped
- 4 large tortillas
- 1 cup mozzarella cheese, shredded
- 1 cup cheddar cheese, shredded
Preparation
- Mix the chicken with salt, onion powder, garlic powder, paprika, and 1 tbsp of vegetable oil.
- Heat a frying pan over medium heat and add 1 tbsp of vegetable oil.
- Fry the chicken until it is cooked through and starts browning.
- Push the chicken to one side of the pan, then add the chopped onion, tomatoes, and red bell pepper.
- Cook the vegetables until they start to soften, then mix them with the chicken.
- In a separate pan, heat a little oil and place a tortilla in the pan.
- Sprinkle a mix of mozzarella and cheddar cheese on half of the tortilla.
- Add the chicken and vegetable mixture on top of the cheese.
- Sprinkle another layer of cheese on top of the filling.
- Fold the tortilla in half to cover the filling and press down gently.
- Cook each side for about 30-40 seconds until crispy and golden.
- Remove from the pan, cut into wedges, and serve hot with avocado or guacamole.
Did you know?
Quesadillas are a staple in Mexican cuisine but have found their place in various cultures due to their versatility and ease of preparation. In Mexico, they are traditionally made using corn tortillas, but flour tortillas are common, especially in northern regions. The word “quesadilla” stems from “queso,” the Spanish word for cheese, underscoring the importance of this key ingredient.
While the classic version involves only cheese, quesadillas can be filled with a wide range of ingredients, from beans and meat to exotic mushrooms and squash blossoms in Oaxaca. This dish has a fascinating history, potentially tracing back to the 16th century when Spanish settlers brought dairy products to Mexico, leading to the innovative fusion of cheeses with indigenous corn tortillas.
In Egypt, recipes like this provide an exciting twist, blending local Middle Eastern ingredients with Mexican flavors. Such creative adaptations keep our culinary traditions dynamic and ever-evolving, offering fresh ideas for meals while celebrating the best of multiple cultures.