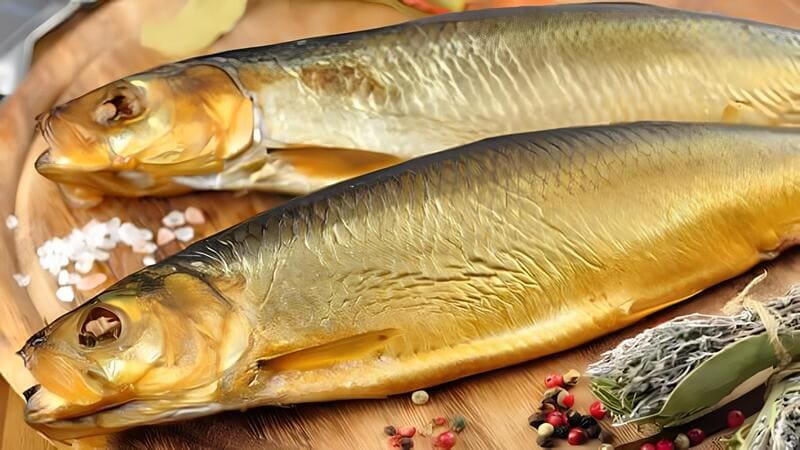
Egyptian Renga (Smoked Herring Fish)

Egyptian Renga Egyptian Recipe

Egyptian Renga, also known as smoked herring fish, is a staple dish often enjoyed during the festive seasons in Egypt, particularly during Sham El-Nessim. This cherished delicacy has a distinct smoky flavor that melds with the rich, salty essence of the herring, making it an unforgettable treat. With ingredients steeped in tradition, it’s a testament to Egypt’s culinary heritage.

The process of smoking and salting gives the renga its unique characteristics, but it also requires careful preparation to ensure it’s enjoyed safely. By following the traditional method, you can reduce excessive sodium while preserving its delightful taste. It’s common to hear that people bond over herring or herring roe as foods, especially during family gatherings.

Ingredients

  • 2 smoked herring fish
  • 2 large onions, finely sliced
  • 3 tomatoes, diced
  • 4 tablespoons lemon juice
  • 2 tablespoons olive oil
  • Fresh parsley, chopped
  • 4 boiled eggs, sliced
  • Salt to taste
  • Black pepper to taste

Preparation

  1. Begin by steaming the herring to reduce its sodium content. Place the herring in a hot water bath and let it steam for about 10 minutes.
  2. Remove the herring from the bath and carefully peel off the skin to avoid high concentrations of hydrocarbons.
  3. Debone the fish and flake the flesh into small pieces.
  4. In a mixing bowl, combine the flaked herring, onions, tomatoes, and parsley.
  5. Drizzle with lemon juice and olive oil, then season with salt and black pepper.
  6. Mix the ingredients well to ensure the flavors meld together.
  7. Arrange the mixture on a serving plate and garnish with sliced boiled eggs for added texture and flavor.
  8. Serve the dish cold, allowing the flavors to further develop.

Did you know?

Herring is not only a traditional Egyptian favorite but also a nutritional powerhouse, rich in omega-3 fatty acids, which are essential for heart health. The method of steaming the fish before consumption helps to reduce the excess sodium, making it a healthier option. Additionally, the smoking process used for preparing Egyptian renga infuses the fish with a depth of flavor that’s hard to replicate.

Interestingly, while herring is considered a healthy food, it’s crucial to be cautious of parasites like nematodes that may be present in improperly treated fish. These worms, often referred to as “tafil alani,” are killed by the freezing and smoking process, ensuring that the fish is safe for consumption. Always inspect the fish and, if necessary, cook it thoroughly to eliminate any remaining parasites.

Moreover, the tradition of eating Egyptian Renga during Sham El-Nessim traces back to ancient Egyptian celebrations. It’s a practice that brings families together, much like how people bond over herring or herring roe as foods for communal meals. While smokers in general should be avoided due to health concerns, enjoying smoked herring in moderation allows you to savor a piece of Egypt’s rich cultural tapestry without overindulgence.

Malfouf Mahshi (Stuffed Cabbage Rolls)

Malfouf Mahshi Egyptian Recipe

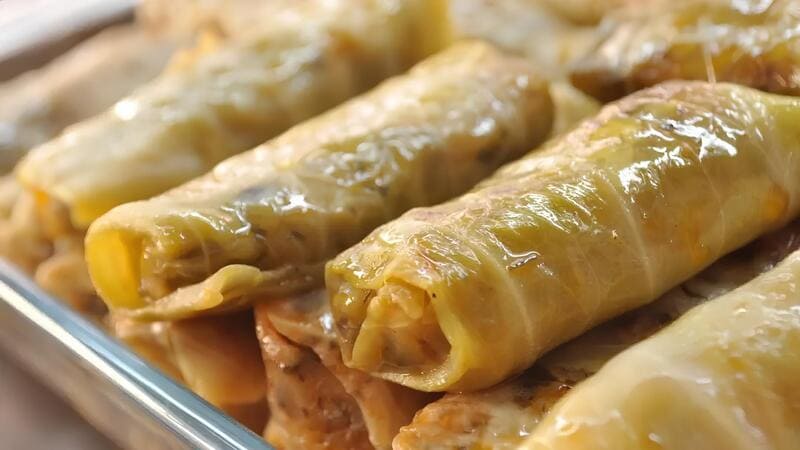
Malfouf Mahshi, also known as stuffed cabbage rolls, is a beloved dish in many Arabic cultures, especially notable in Egyptian cuisine. Its appeal lies in the blend of aromatic herbs and robust flavors packed into tender cabbage leaves. Traditionally served during gatherings and celebrations, this dish symbolizes the essence of comfort food across the Middle East.

The method of making Malfouf Mahshi can be passed down through generations, preserving unique familial touches. The rolling and stuffing process can be quite therapeutic, making it an enjoyable and hands-on cooking experience. This vegetarian/plant-based version is both satisfying and full of savory and slightly tangy flavors, making it a favorite for plant lovers.

Ingredients

  • 1 medium or small cabbage
  • 2 tablespoons tomato sauce
  • 4 medium onions, chopped
  • ½ cup oil
  • 1 tablespoon ghee or butter (optional)
  • 500g tomato juice
  • 500g Egyptian rice, washed and drained
  • 1 raw onion, chopped
  • 1 teaspoon salt
  • 1 teaspoon cumin
  • 1 teaspoon dried coriander
  • 1 teaspoon sugar
  • 1 pinch black pepper
  • Fresh coriander and dill, chopped

Preparation

  1. Start by removing the hard core of the cabbage. Boil water in a large pot and add cabbage leaves one by one, cooking each until soft but not mushy (about 10-15 minutes). Lay them out to air.
  2. Remove the thick veins from the leaves. Roll and cut the leaves into manageable sizes based on the desired length of the rolls.
  3. Heat ½ cup of oil in a pot, optionally adding a tablespoon of ghee or butter. Sauté four chopped onions until soft but not golden.
  4. Add 2 tablespoons of tomato sauce and mix well. Season with salt, cumin, dried coriander, and a little sugar. Stir in 500g of tomato juice and cook until the mixture thickens.
  5. Allow the mixture to cool before combining it with washed rice, another chopped raw onion, fresh chopped coriander, and dill. Mix well and season again with salt, cumin, dried coriander, and black pepper.
  6. Prepare a pot by layering cabbage leaves at the bottom, followed by sprigs of dill and coriander.
  7. Take a cabbage leaf, place a spoonful of the rice mixture in the center, and roll tightly. Repeat and arrange the rolls in the pot, not too tightly packed.
  8. Gradually add warm broth or water until it covers the rolls just below the top layer.
  9. Place a heatproof plate on top to prevent rolls from unwrapping, and bring to a boil. Reduce heat and simmer, adding liquid as necessary until the rice is cooked and the rolls are tender (about 45 minutes to 1 hour).
  10. Serve hot, garnished with more fresh herbs if desired.

Did you know?

Malfouf Mahshi, or mahshi krombi, is more than just a dish; it’s a part of the Middle Eastern culinary heritage. Often, the recipe varies from household to household depending on regional availability of herbs and spices. Cabbage rolls are believed to have originated in the ancient Middle East and areas of the Ottoman Empire. The technique of wrapping food is a clever cooking method that minimizes waste and maximizes flavor. While some recipes include meat, this vegetarian version shines with its robust and aromatic profiles thanks to plenty of onions and fresh herbs.

One fascinating point about this traditional food is its nutritional benefits. Cabbage is rich in vitamins C and K, and using rice as a stuffing makes it a wholesome, fiber-rich meal. Furthermore, these rolls could be prepared well in advance and stored, facilitating convenience for festive preparations. The process itself, with its deliberate yet straightforward steps, emphasizes the communal and hands-on nature of cooking in Egyptian and broader Arabic cultures, making it much more than just a meal, but an experience.

Egyptian Shatta (Spicy Chili Sauce)

Egyptian Shatta Egyptian Recipe

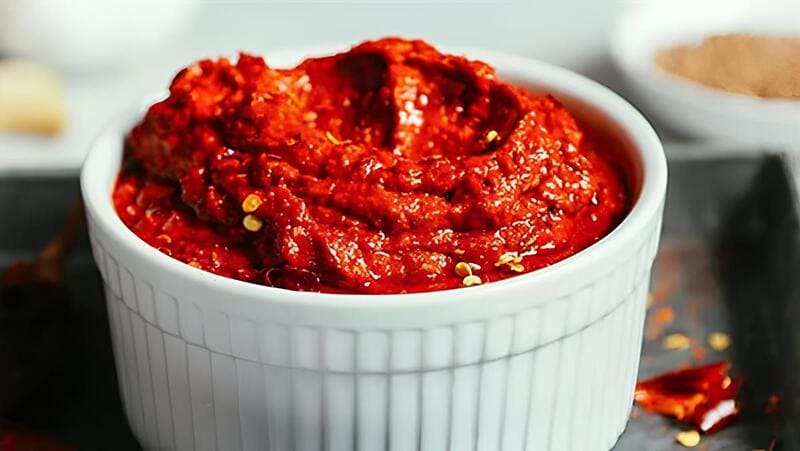
Egyptian Shatta, also known as spicy chili sauce, holds a special place in the hearts of spice lovers. This piquant condiment traces its roots back to ancient Arabic culinary traditions, enhancing a variety of dishes with its fiery kick.

The flavor profile of Egyptian Shatta is robust, featuring a harmonious blend of smoky, tangy, and savory notes. Made primarily from hot red peppers, this sauce is a versatile addition to any meal, perfect for those who crave an authentic Egyptian touch in their cuisine.

Ingredients

  • 1 kilogram of hot red peppers
  • 1/4 cup vinegar
  • 4 tablespoons minced garlic
  • 2 tablespoons salt
  • 1 tablespoon paprika
  • 1 tablespoon cumin
  • 1 tablespoon coriander
  • 1/2 cup water from boiled peppers
  • 2 tablespoons olive oil or corn oil (for preservation)

Preparation

  1. Wash and drain the red peppers thoroughly. Remove the pepper heads, taking care to wear gloves to avoid burns.
  2. Boil a pot of water and add the peppers for a quick five-minute blanching.
  3. Drain the peppers and let them cool.
  4. Transfer the cooled peppers to a blender, add minced garlic, salt, paprika, cumin, coriander, and half a cup of the pepper boiling water.
  5. Blend until a smooth, thick paste forms.
  6. Add additional water if needed to achieve the desired consistency.
  7. Transfer the Shatta to a jar and top with two tablespoons of olive oil or corn oil to preserve freshness.

Did you know?

Egyptian Shatta isn’t just a modern-day favorite; it has a rich history dating back to ancient times. The use of hot peppers in Arabic cuisine is centuries old, linked to spice routes that brought diverse flavors from South Asia and the Americas. Shatta provides a hot and vibrant addition to dishes such as baba ghanoush, tahina, and grilled meats, transforming simple meals into gourmet experiences.

Interestingly, while Shatta is traditionally made with hot red peppers, variations include adding milder peppers to balance the heat. It’s not just a condiment but a seasoning that can be incorporated into marinades for fish, chicken, and even eggplant dishes. Preservation methods, like adding a layer of oil on top, allow this spicy sauce to stay fresh for over a year without refrigeration, echoing ancient practices of prolonging the shelf life of homemade sauces.

Thus, Egyptian Shatta isn’t merely a hot sauce; it’s a historical journey of flavors, a nod to the ingenuity of ancient culinary arts, and a versatile staple in Egyptian cuisine.

Ashta Cream (Easy)

Ashta Cream Egyptian Recipe

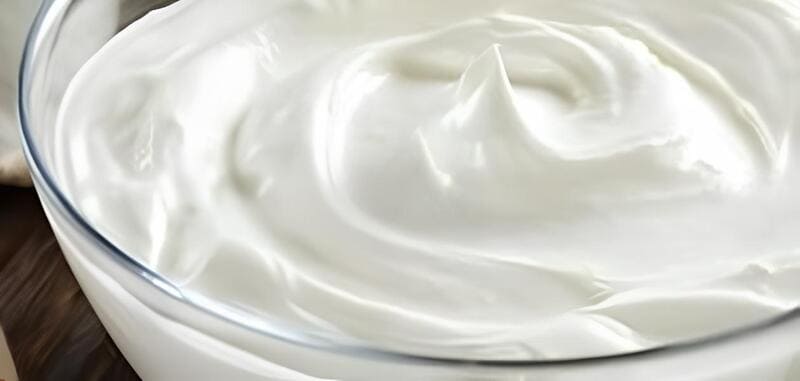
Celebrated for their lush texture and versatile usage, Ashta cream—also known as qashta or qeshta—is a cornerstone of Middle Eastern desserts. Revered during festive seasons like Ramadan, this thick, clotted cream is an essential layer in many Arabic sweets, bringing a rich, creamy experience to delights such as baklava and kunafa.

This homemade Ashta cream version is simple yet profoundly satisfying. Its recipe uses common kitchen staples, ensuring accessibility. Much like a symphony, each ingredient contributes its unique notes, culminating in a harmonious, creamy concoction. This recipe offers a delightful balance of textures and flavors, encouraging you to explore the delicious landscape of Egyptian desserts.

Ingredients

  • 1 liter of milk
  • 2 tablespoons vinegar
  • 2 tablespoons cornstarch
  • 2 tablespoons flour
  • 1 tablespoon butter
  • ½ teaspoon mastic (optional)
  • Water (as needed)

Preparation

  1. Heat the milk in a large pot over high heat until nearly boiling.
  2. Add the vinegar to the pot and stir until the milk curdles and separates into solids and whey.
  3. Allow it to boil slowly for 5 minutes, then strain the curds using a cheesecloth or fine strainer.
  4. In a separate saucepan, mix the strained curds with the cornstarch and flour.
  5. Gradually add the milk while stirring continuously over medium heat until the mixture thickens.
  6. Remove from heat once the mixture reaches a thick, creamy consistency.
  7. Stir in the butter and finely crushed mastic, if using, until fully incorporated.
  8. Spread the mixture in a tray, cover, and let it cool to room temperature before refrigerating for at least an hour.

Did you know?

The origins of Ashta cream stem from centuries-old traditions in the Middle East, where it has been a luxurious topping or filling in numerous pastries. Known as “qeshta” in Egyptian and Levantine cuisines, this cream is distinct from Western equivalents due to its unique preparation methods. The process of curdling milk with vinegar to create this thick layer is akin to making clotted cream but imbued with regional nuances.

When it comes to cultural significance, Ashta cream is indispensable during religious celebrations such as Ramadan. It is generously layered in sweets like Kunafa and Othamaliyah, each bite evoking communal warmth and festive spirits. As for its versatility, besides being a part of intricate desserts, Ashta cream can also be a simple yet indulgent topping for fruits, adding a creamy contrast.

Interestingly, the caloric content of Ashta cream can vary widely based on how it’s prepared or used. While indulgent, there are ways to prepare a more healthy version by adjusting the amount of butter or using low-fat milk. Nevertheless, this delightful cream remains a beloved staple in Middle Eastern households, contributing a rich and irresistible flavor profile to any dish it graces.

Makroud

Makroud Egyptian Recipe

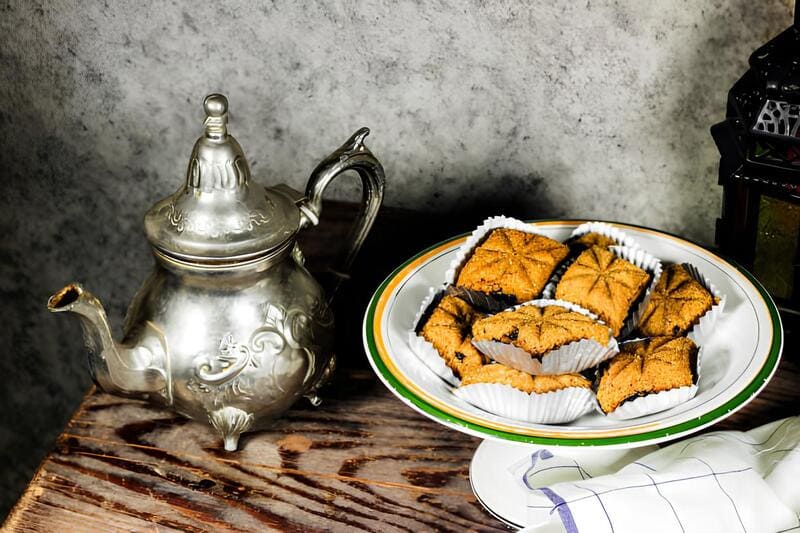
Makroud, also spelled Makrout, is a beloved semolina-based dessert known for its rich flavors and unique preparation method. Originating from the regions of North Africa, particularly Tunisia, Algeria, and Egypt, this sweet treat is a staple at festive occasions, especially during Ramadan and Eid. The combination of semolina dough with a filling of dates or nuts, and a finish of aromatic honey syrup, has made Makroud a timeless favorite.

In Tunisia, this dessert is often referred to as Makroud El Louse. The Tunisian version, characterized by its almond filling, varies slightly from the Algerian and Egyptian adaptations, which may use date paste or other nuts. Each culture brings its own twist to this delightful sweet, creating a delightful culinary heritage that speaks volumes of tradition and cultural exchange.

Ingredients

  • 3 cups medium semolina
  • 1/2 teaspoon salt
  • 1 cup melted ghee
  • 1/4 cup vegetable oil
  • 1/2 cup warm water
  • 1/2 cup honey
  • Date paste (or almond paste for filling)

Preparation

  1. Combine the medium semolina and salt in a large mixing bowl.
  2. Pour in the melted ghee and vegetable oil, then mix thoroughly until the semolina is fully coated.
  3. Slowly add the warm water and knead until the mixture forms a pliable dough.
  4. Cover the dough with a blanket or cloth and let it rest for at least 10 hours or overnight.
  5. Once rested, take a portion of the dough and flatten it into a rectangular shape.
  6. Place the date paste (or almond paste) along the center of the rectangle.
  7. Fold the dough over the filling and seal the edges to form a log.
  8. Cut the log into diamond-shaped pieces.
  9. Heat oil in a frying pan to medium heat, then fry each piece until golden brown.
  10. Remove from oil and immediately dip into warm honey.
  11. Allow the Makroud to cool slightly before serving.

Did you know?

Makroud is a dessert rooted in the history of the Maghreb (Northwest Africa). Each region boasts its own version, often reflecting the local palates and traditions. In Tunisia, for example, Makroud El Louse is particularly renowned for its use of ground almonds, adding a unique texture and flavor. Contrastingly, the Algerian interpretation usually prefers a date filling, known as “Makroud Algérien,” which gives it a different, more robust sweetness.

Historically, Makroud was a symbol of hospitality and abundance, often made in large quantities to share with guests during special occasions and religious festivals like Ramadan and Eid. The meticulous process of preparing and resting the semolina dough is believed to result in a finer, crisper texture, making the dessert not only a labor of love but also a culinary art form.

Makroud also holds a significant place in Egyptian culinary tradition, reflecting the country’s rich history of incorporating diverse culinary techniques and ingredients from neighboring regions. In Egypt, Makroud is often enjoyed with a hint of cinnamon in the filling, adding a warm and spicy undertone to the dish.

In addition to its delightful taste, Makroud is celebrated for its shelf-life. The honey coating acts as a natural preservative, allowing the dessert to last for weeks, making it a practical yet luxurious treat for long-lasting enjoyment.

Whether savored fresh or over a period of days, Makroud remains a cherished jewel of North African cuisine, representing a confluence of flavors, traditions, and histories that span across borders and generations.

Baghrir (Moroccan Crepes)

Baghrir Egyptian Recipe

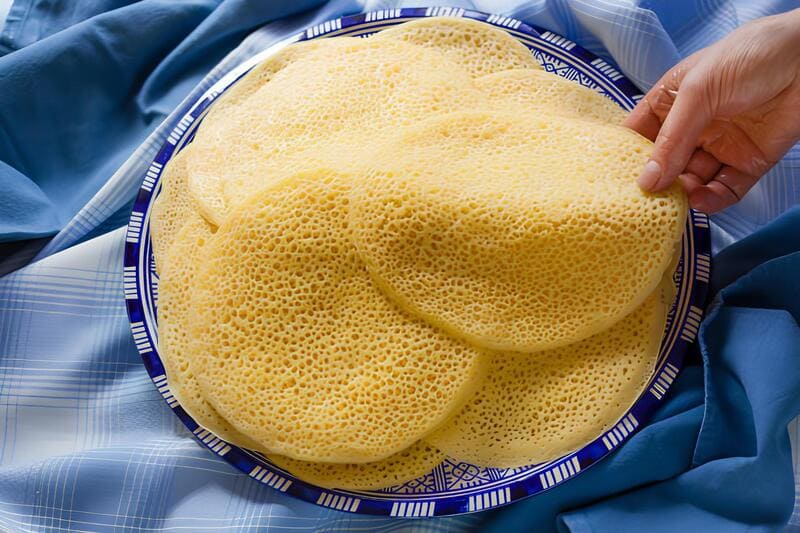
Baghrir, often referred to as Moroccan Crepes, are a beloved traditional dish in Morocco. Characterized by their unique porous texture, Baghrir absorb and hold onto toppings like honey, butter, or jam perfectly, making each bite a flavor explosion. Historically, these pancakes have been a staple breakfast or snack, shared among families and at festive gatherings.

Known also as “1000-hole pancakes” due to their spongy appearance, these crepes are distinct for their lightness and delicate taste. They’re particularly famous in Algeria and other North African countries as well, where slight variations may exist. Whether enjoyed with Moroccan tea or as a standalone treat, Baghrir captures the essence of North African culinary tradition.

Ingredients

  • 2 cups semolina flour
  • ½ cup fine white flour
  • 1 tablespoon baking powder
  • 1 teaspoon yeast powder
  • 1 teaspoon salt (or to taste)
  • 3 cups warm water

Preparation

  1. In a large mixing bowl, combine 2 cups of semolina flour, ½ cup of fine white flour, 1 tablespoon of baking powder, 1 teaspoon of yeast powder, and 1 teaspoon of salt.
  2. Measure out 3 cups of warm water using the same cup for consistency. Add this to the dry ingredients.
  3. Mix all ingredients just until combined. You can use an electric mixer or a grinder for about 1-2 minutes until the mixture is smooth and well-blended.
  4. Let the mixture rest for about 15 minutes to allow the dough to ferment.
  5. Preheat a non-stick frying pan over medium heat. Ensure the pan is thoroughly heated before starting.
  6. Pour a ladleful of the batter into the pan. Leave it to cook until bubbles form on the surface and the crepe is firm (about 1-3 minutes).
  7. Once the Baghrir is cooked, remove it from the pan and place it on a plate. Repeat with the remaining batter.
  8. Serve warm with honey, jam, or butter as per your preference. Enjoy your traditional Moroccan crepes!

Did you know?

Baghrir is not just a culinary delight but also a cultural symbol in Morocco and Algeria. The porous texture is achieved through a unique leavening process using a combination of yeast and baking powder, which creates the delicate holes that define Baghrir. These holes are essential as they help the crepe soak up the delicious toppings that are often rich and flavorful.

In different regions, variations of Baghrir exist, sometimes incorporating additional ingredients like anise seeds or saffron for a slight twist in flavor. While traditionally served with honey or butter, modern adaptations have seen Baghrir paired with both sweet and savory toppings, from almond paste to spiced meat fillings.

The traditional method of cooking Baghrir over a flat, clay griddle called a “makhla” is still practiced in rural areas, adding historical significance and an artisanal touch to each batch. What’s fascinating is that these crepes are also a sister treat to the Middle Eastern Khobz Al-Moftah, showcasing the rich, intertwined culinary heritage of the region.

So next time you enjoy these delightful, thousand-holed pancakes, remember you’re partaking in a bite-sized piece of Moroccan and Algerian history!

Msemen Or Rghaif

Msemen Or Rghaif Egyptian Recipe

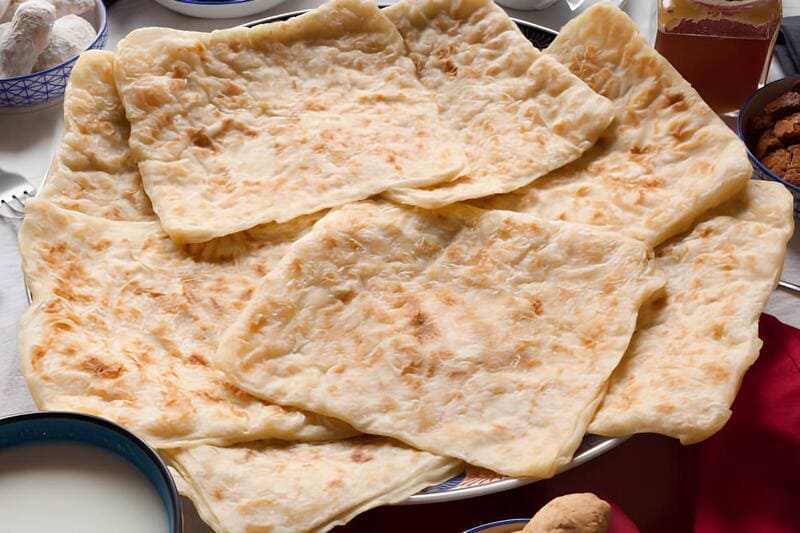
Msemen, also known as Rghaif, is a beloved Moroccan and Algerian flatbread. Traditionally enjoyed for breakfast, it’s a quintessential part of Maghrebi cuisine, showcasing the region’s knack for turning simple ingredients into delightful dishes. This layered, crispy bread is often served with honey or cheese, adding a touch of sweetness or savory to the meal.

The artistry of Msemen lies in its texture and flavor. With layers upon layers of thin, buttery dough, each bite reveals a unique combination of crispy exterior and soft interior. Simple to prepare yet deeply flavored, this flatbread represents the warmth and tradition of North African culinary heritage.

Ingredients

  • 250g Fino flour or semolina
  • 250g all-purpose flour
  • 1 tsp salt
  • Lukewarm water, as needed
  • Vegetable oil, for brushing
  • Melted butter, for spreading

Preparation

  1. In a large plate or a Moroccan Gasaa, place the Fino flour or semolina.
  2. Add the all-purpose flour and salt, mixing all ingredients together.
  3. Gradually add lukewarm water, mixing continuously until a dough ball forms; it should be neither too moist nor sticky.
  4. Knead the dough with your fists and palms for 10 minutes, until smooth and elastic.
  5. Brush the dough with a small amount of vegetable oil.
  6. Cover with a clean cloth and let rest for 20 minutes.
  7. Brush the rested dough again with vegetable oil.
  8. Grasp portions of the dough and cut into tennis ball-sized balls with your thumb and index fingers.
  9. Lightly brush dough balls with vegetable oil, cover with a clean cloth and let rest for 15 minutes.
  10. Brush your work surface with vegetable oil, take one dough ball and flatten with your palm.
  11. Using your fingers, gently expand it into a very thin disk.
  12. Spread a bit of melted butter over the dough, sprinkle with Fino flour or semolina.
  13. Fold the upper edge towards the center, add more melted butter.
  14. Fold the lower edge towards the center, add more melted butter, sprinkle with semolina again.
  15. Fold right and left edges towards the center to form a square.
  16. Flatten the dough square with your fingers and palm to make it three times larger, spread some melted butter.
  17. Heat your pan on high heat, then reduce to medium-high.
  18. Cook Msemen on both sides for a few minutes each, turning several times until golden brown and cooked through.
  19. Serve immediately with honey, cheese, or any toppings of choice.

Did you know?

Msemen can be transformed into a stuffed version, often referred to as “Msemen Mahshi.” It’s typically filled with a savory mixture of onions, spices, and occasionally minced meat, making it a hearty option for any meal. The versatility of Msemen extends beyond its traditional breakfast role; it can be an appetizer, side dish, or even a main course depending on the stuffing.

In Egyptian cuisine, though less common, variations similar to Msemen exist, highlighting the interconnectedness of North African culinary traditions. Preparing Msemen is considered an art in many Moroccan households, showcasing the cook’s skill and attention to detail. So, whether you’re mastering the art of making Msemen or enjoying its delicious layers, you are participating in a rich culinary history that spans generations and borders.

Mallow Leaf Soup (Khobiza)

Mallow Leaf Soup Egyptian Recipe

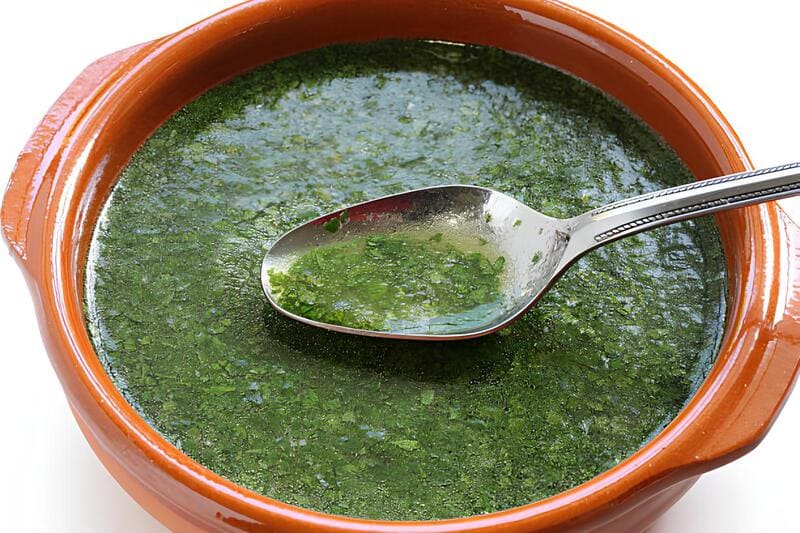
Mallow Leaf Soup, or Khobiza, is a cherished dish in Egyptian cuisine, renowned for its nourishing properties and deep connection to the country’s gastronomic heritage. Its vibrant green color and earthy, slightly tangy flavor make it a comforting addition to any meal, especially enjoyed during colder months.

Traditionally served with bread or rice, Khobiza embodies simplicity and freshness. The use of mallow leaves, sometimes combined with Swiss chard, creates a rich and hearty soup that is not only soul-warming but also brimming with nutritional benefits. This recipe will guide you in preparing this classic dish step-by-step.

Ingredients

  • 1 package of fresh hibiscus (mallow) leaves
  • 1 bunch of Swiss chard, boiled
  • 1 small bunch of dill, finely chopped
  • 1 small bunch of green coriander, finely chopped
  • ¼ cup of washed and soaked rice
  • 1 tablespoon of ghee
  • Salt to taste

Preparation

  1. Wash the mallow leaves and cut them into small pieces.
  2. Boil the Swiss chard and set it aside.
  3. Combine the mallow leaves with the boiled Swiss chard in a large pot.
  4. Add the finely chopped dill and green coriander to the pot.
  5. Sprinkle the soaked rice over the mixture.
  6. Pour in enough water to cover the ingredients, ensuring the mixture doesn’t overflow.
  7. Heat the pot until the soup begins to boil, then reduce to a simmer.
  8. Continuously stir to avoid sticking, ensuring the rice is fully cooked.
  9. In a separate pan, heat the ghee and fry the rice with a bit of oil until golden, then add it to the soup.
  10. Season with salt, and keep stirring until the soup achieves a thick but not dry consistency.
  11. Serve hot with a side of bread or vermicelli rice, ensuring every bowl is generously portioned.

Did you know?

Mallow Leaf Soup is more than just a tasteful delight; it’s a nutritional powerhouse. The mallow plant (Hibiscus cannabinus) and its seeds are packed with vitamins A and C, calcium, and iron. These nutrients boost your immune system, improve skin health, and promote bone strength. In folk medicine, mallow has been traditionally used to soothe throat irritations and combat inflammation.

The health benefits extend beyond vitamins. Mallow leaves provide dietary fiber, which aids digestion, and antioxidants that help fight off free radicals. The dill and coriander used in the recipe are also rich in essential oils and antioxidants, contributing to overall well-being. Interestingly, Swiss chard, sometimes added to the soup, contains betalains known for their anti-inflammatory properties.

In Egyptian culture, mallow soup is especially popular during the winter months and is considered a comfort food, bringing warmth and a sense of community. Its simplicity and nutritional value make it a timeless recipe that not only pleases the palate but also nurtures the body. So, the next time you prepare Khobiza, you’re not just making a meal—you’re creating a nourishing experience passed down through generations.

Batbout (Moroccan Pita Bread)

Batbout Egyptian Recipe

Batbout, also known as Moroccan Pita Bread, is a multidimensional delight. Its origins trace back to the heart of North African cuisine, notably Morocco. Recognized for its versatile use, this bread is a staple in many households and is celebrated for its quick preparation and versatility.

The bread’s flavor is mild yet slightly nutty, thanks to the combination of durum and white flours. When cooked, batbout puffs up beautifully, leaving a pocket that’s perfect for stuffed delicacies. This pocket can be filled with savory or sweet ingredients, making it a favorite across generations.

Ingredients

  • 500g white flour
  • 250g durum flour (Fino flour)
  • 1.5 tablespoons granulated sugar
  • 1.5 tablespoons yeast (1 tablespoon if hot weather)
  • 1/2 teaspoon salt
  • Water (approximately 250-300ml)

Preparation

  1. Mix the white and durum flours together in a large bowl.
  2. Add granulated sugar and yeast to the flour mixture and blend well.
  3. Slowly add water while mixing until a dough forms. The dough should be slightly sticky.
  4. Knead the dough until it is smooth and elastic (around 10 minutes by hand or 5 minutes in a kneading machine).
  5. Add salt and continue to knead for an additional 5 minutes.
  6. Divide the dough into small, evenly sized balls based on the desired size of your bread.
  7. Roll each ball lightly in a bit of flour and flatten them slightly.
  8. Place on a floured surface, cover with a cloth, and let them rest for 15-20 minutes to ferment.
  9. Heat a non-stick frying pan or a griddle over medium heat.
  10. Cook each piece of dough on the pan, flipping continuously to ensure even cooking and puffing, until both sides are golden brown and puffed up.
  11. Remove from heat and let cool slightly before serving.

Did you know?

Batbout, or Matlou in Tunisia, is quite similar to Egyptian “Baladi” bread in its preparation and uses. This bread is a true Mediterranean staple that showcases the ingenuity of regional cuisines by minimizing food wastage through its fermentation process. Historically, the wide availability of both durum and white flour has made batbout a household essential.

Batbout is often made in mini versions, making them perfect for individual servings or as bread for stuffed appetizers. A popular way to serve mini batbouts is by filling them with savory mixtures like spiced ground meat, olives, and roasted vegetables, or even sweet combinations like honey and nuts. The bread’s ability to maintain its softness for hours makes it an ideal choice for picnics or as a part of a mezze platter.

Learning how to make batbout is an excellent entry point for those interested in Moroccan or Tunisian cuisine. Its simple ingredient list and straightforward preparation mean that you get to enjoy the deep culinary traditions of North Africa right at home. Whether paired with stews, used for sandwiches, or enjoyed plain, batbout remains a versatile and beloved part of the Mediterranean culinary landscape.

Egyptian Baladi Salad

Egyptian Baladi Salad Egyptian Recipe

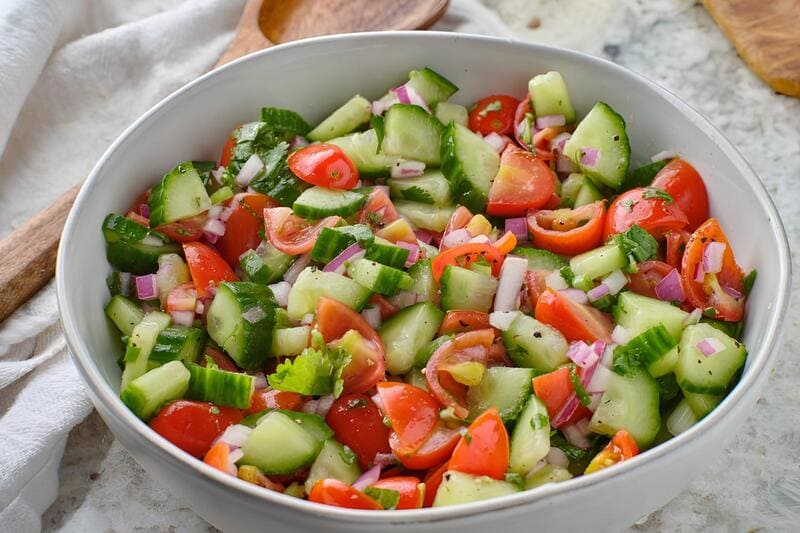
Salata baladi is a quintessential Egyptian side dish that has graced tables for generations. This traditional salad, often compared to the Lebanese fattoush, is a vibrant array of fresh vegetables combined with a tangy, zesty dressing. Known for its refreshing flavor and knack for cutting through rich dishes, it’s a staple in many Egyptian households.

Whether served alongside main courses or enjoyed on its own, salata baladi (sometimes referred to as Egyptian garden salad) is celebrated for its simplicity and balanced calories. Packed with crisp vegetables and fragrant herbs, it’s not just delicious but also a nutritionally rich addition to any meal. Let’s dive into making this authentic dish that embodies the essence of Egyptian cuisine.

Ingredients

  • 2 large tomatoes, diced
  • 1 cucumber, diced
  • 1 green bell pepper, diced
  • 1 small red onion, finely chopped
  • ½ cup fresh parsley, chopped
  • 2 tablespoons fresh mint, chopped
  • 2 tablespoons extra-virgin olive oil
  • 2 tablespoons lemon juice
  • 1 teaspoon ground cumin
  • Salt and pepper to taste

Preparation

  1. In a large bowl, combine the diced tomatoes, cucumber, green bell pepper, and red onion.
  2. Add the chopped parsley and fresh mint, mixing well to distribute the herbs evenly throughout the vegetables.
  3. In a small bowl, whisk together the extra-virgin olive oil, lemon juice, and ground cumin until emulsified.
  4. Pour the dressing over the vegetable mixture and toss gently to ensure all ingredients are well-coated.
  5. Season the salad with salt and pepper to taste, adjusting as necessary.
  6. Allow the salad to sit for about 10 minutes before serving to let the flavors meld together.

Did you know?

Salata baladi is not just a feast for the taste buds but also a powerhouse of nutrients. The fresh vegetables provide essential vitamins and minerals that contribute to overall health. The parsley and mint, apart from adding a burst of fresh flavor, bring antioxidants and anti-inflammatory properties to the table. This salad is often found accompanying heavier Egyptian dishes like koshari or grilled meats, providing a refreshing contrast and balance.

Interestingly, the use of cumin in the dressing is a nod to the Middle Eastern and North African culinary tradition, which often incorporates this earthy, aromatic spice. While salata baladi is inherently Egyptian, its simplicity and adaptability have made it popular in other Arab countries, albeit with slight regional variations.

Moreover, in an era where calories and health-conscious eating are a priority, this salad shines as a low-calorie option that doesn’t compromise on flavor. Whether you’re familiar with its Lebanese cousin or new to this Arabic delight, salata baladi promises a delightful addition to your culinary repertoire.

Embrace this dish at your next meal and experience the timeless flavors that have captivated hearts (and taste buds) across cultures and generations.